Creating a New TrustZone Project
To create a new TrustZone project, in MPLAB® X IDE, Select File > New Project or click  . The New Project wizard will open. Perform following steps:
- Open the MPLAB® X IDE.
- Create a New Project by clicking the New Project icon or by selecting File > New Project.
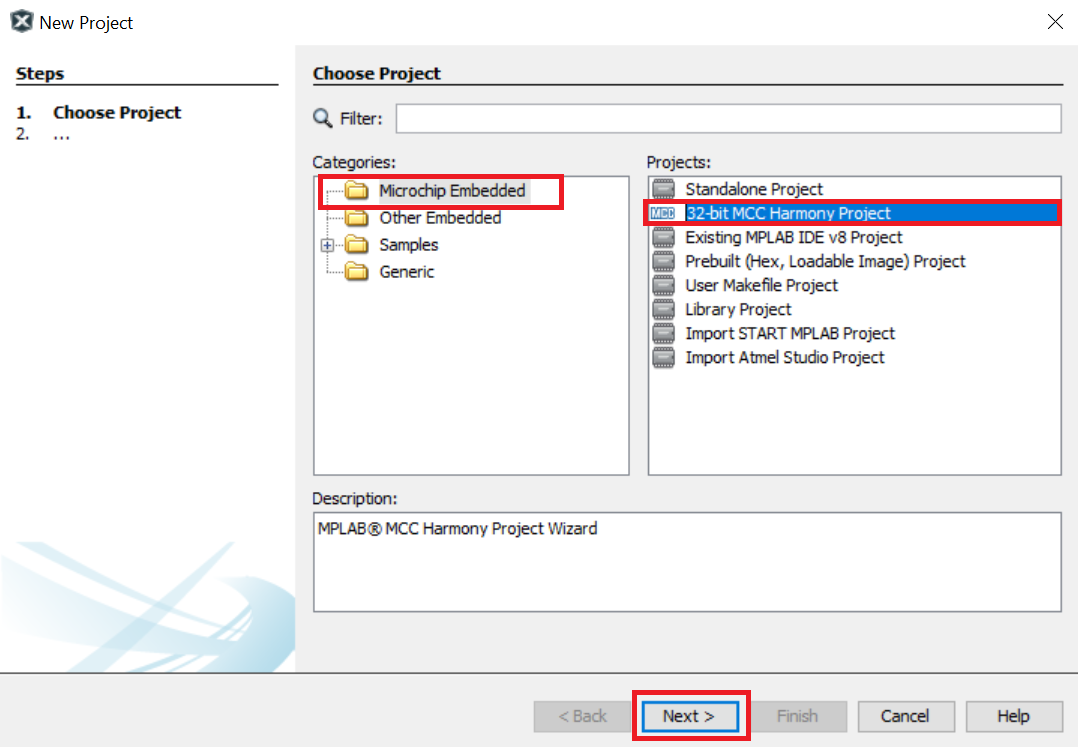
- In the New Project window select Application Project(s).
-
Click Next.
Note:
- If the option 32-Bit MPLAB Harmony v3 Project is not available, install the MPLAB® Harmony 3 Launcher plug-in from Tools > Plugins > Available Plugins before continuing with this demonstration.
-
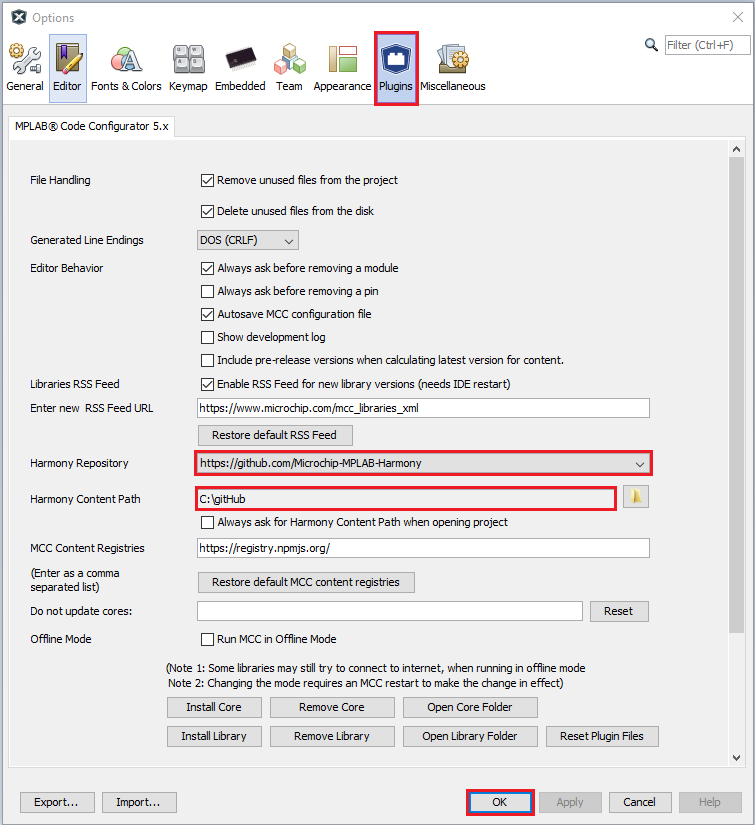
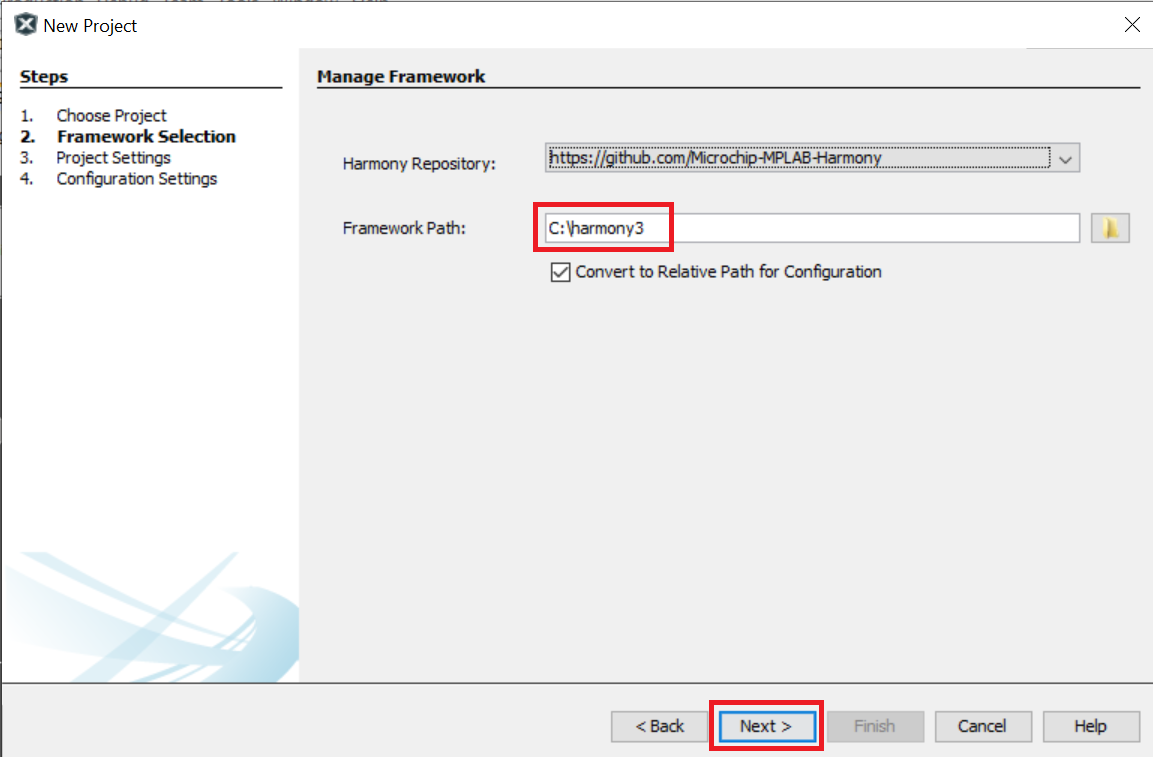
If the Harmony Content Path and Repository is not set, then go to Tools > Options, select Pugins and select the Harmony Repository and enter the your Harmony Content Path as shown in the below figure to download the Harmony packages.
-
In the Select Device dialog window, select the target Device ATSAML11E16A from the drop-down menu as shown below and Click Next.
-
In the Select Compiler dialog window, select the latest or needed Compiler as follows:
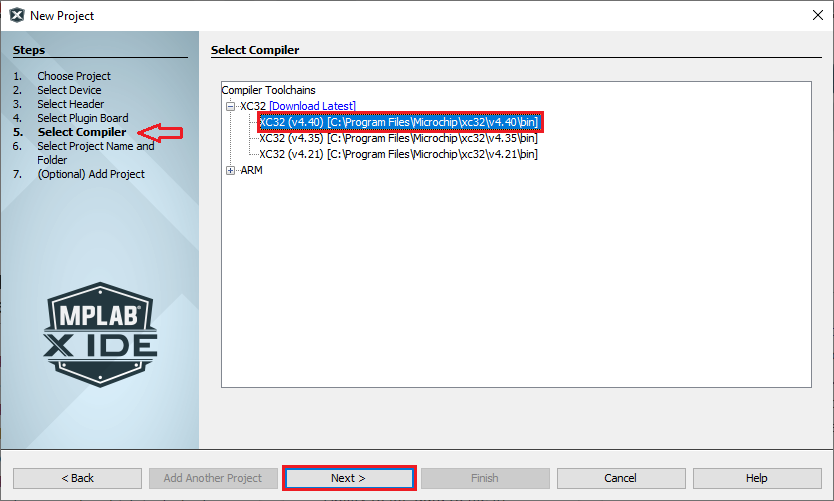
- Click Next.
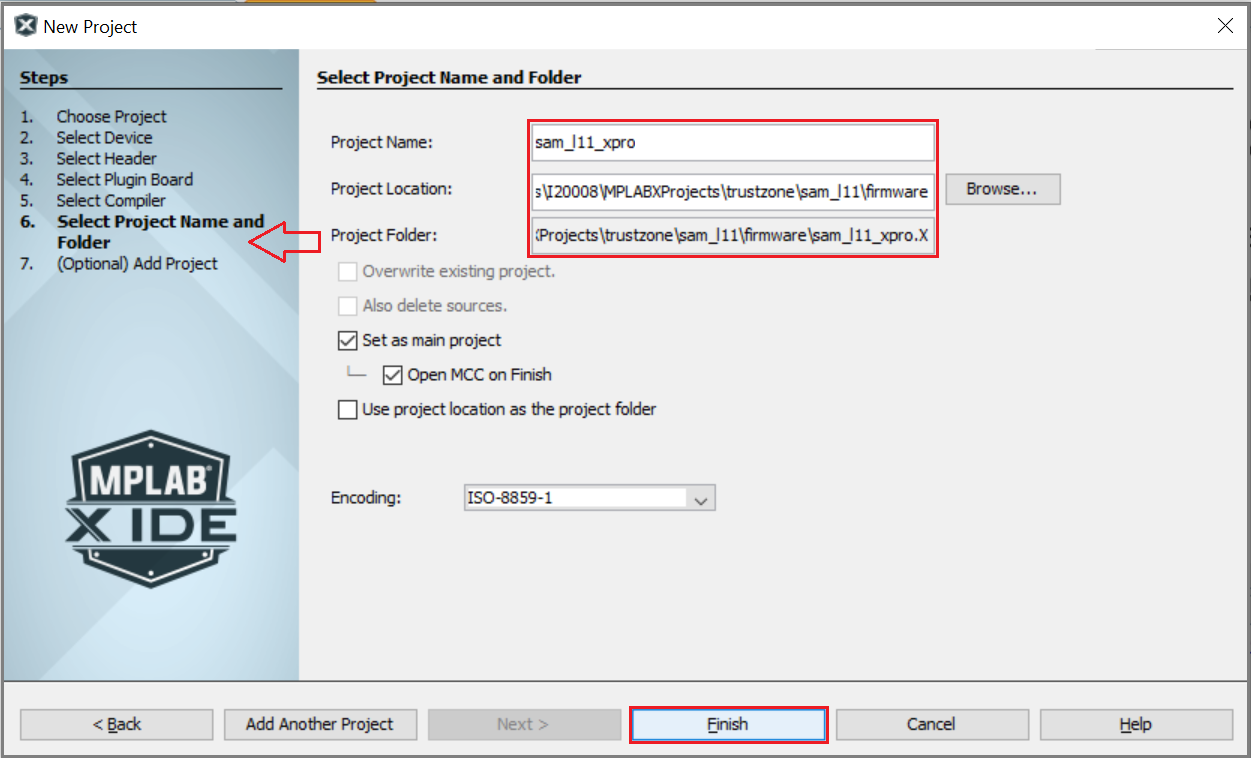
- In the Select Project Name and Folder dialog window, fill in or select the information needed as follows:
- Project Name: Project naame i.e. “sam_l11_xpro”
- Project Location: Select or Enter the Project Location of your choice.
- For Example: sam_l11 and the Project Location is:
C:/Users/<user_id>/MPLABXProjects/trustzone/sam_l11/firmware
- Note:
- Kindly suffix the firmware folder name after the Project folder “sam_l11”.
- For Example: sam_l11 and the Project Location is:
- Project Folder: This is a read-only field, MCC automatically creates a Secure and Non-Secure project folder as shown below.
- Secure Project:
C:/Users/<user_id>/MPLABXProjects/trustzone/sam_l11/firmware_secure- Secure project .X folder can be fount at:
C:/Users/<user_id>/MPLABXProjects/trustzone/sam_l11/firmware_secure/sam_l11_xpro.X
- Secure project .X folder can be fount at:
- Non-Secure Project:
C:/Users/<user_id>/MPLABXProjects/trustzone/sam_l11/firmware- Non-Secure project .X folder can be fount at:
C:/Users/<user_id>/MPLABXProjects/trustzone/sam_l11/firmware/sam_l11_xpro.X
- Non-Secure project .X folder can be fount at:
- Note:
- The project group is created in the Non-Secure project path i.e.,
C:/Users/<user_id>/MPLABXProjects/trustzone/sam_l11/firmware/sam_l11_xprogroup
- Secure Project:
- Click Finish.
- Download the Required Mandatory Harmony Content if not downloaded.
-
The below MCC Content Manager window will open if the Mandatory Harmony Contents are not present in the Harmony Content Path mentioned in the Step 4.
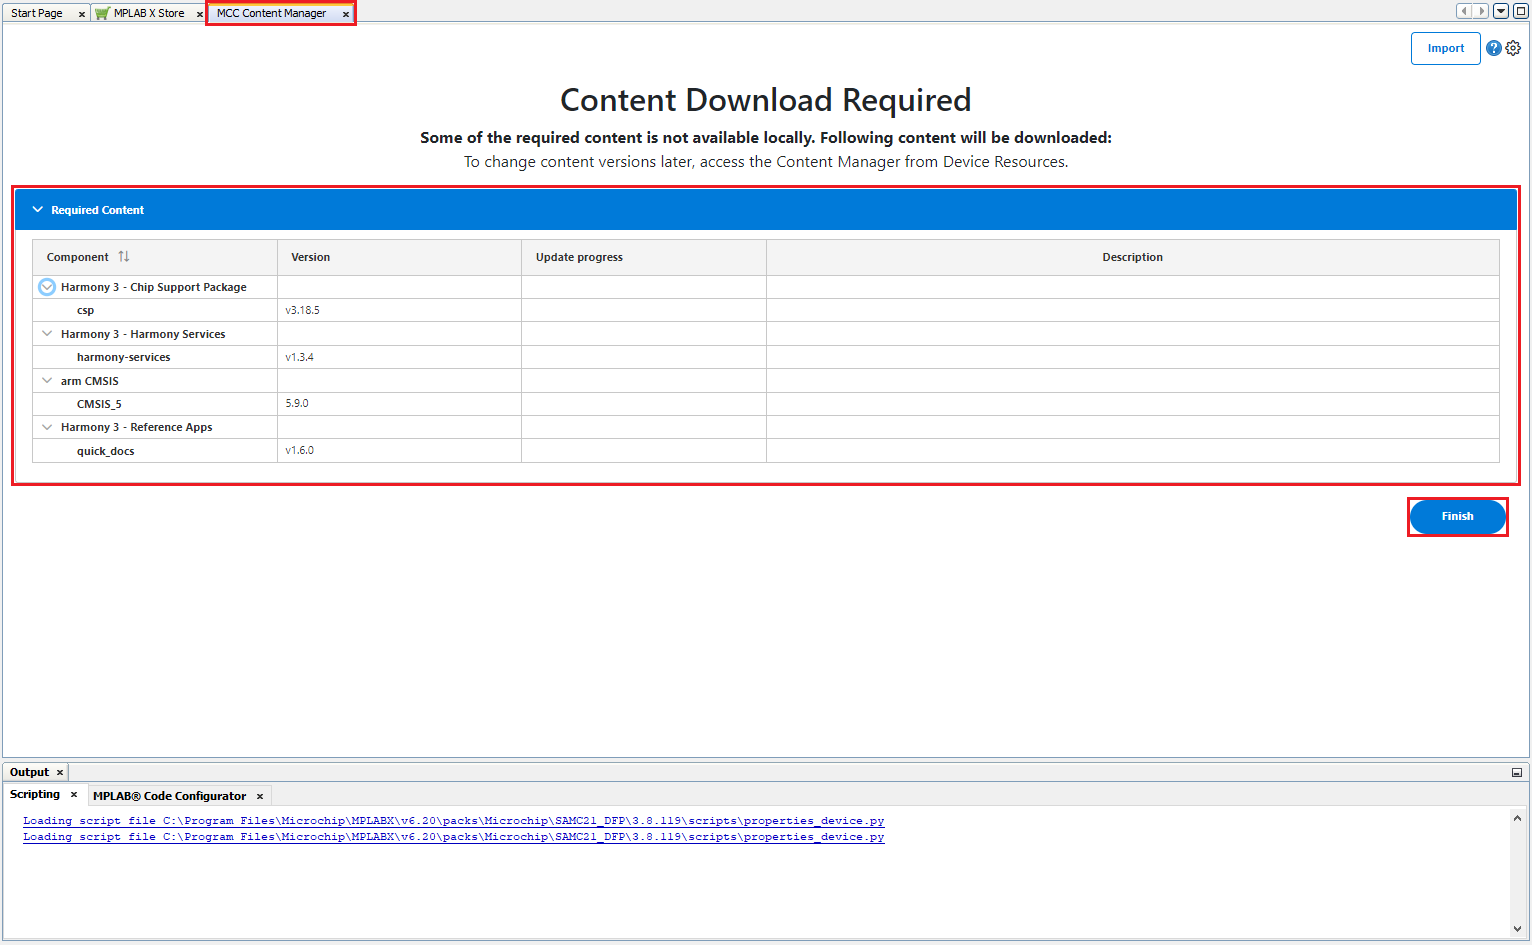
- Click on the Finish Button in the MCC Content Manager Wizard to start downloading the Mandatory Harmony Content.
- Note:
- For this demonstration application, the following MPLAB Harmony v3 packages are required: csp, harmony-services, CMSIS, and quick_docs. The MPLAB Harmony 3 Content Manager tool simplifies the downloading of the MPLAB Harmony v3 packages. If these packages are not downloaded, then the user can use the MPLAB Harmony 3 Content Manager tool to download them onto their computer.
-
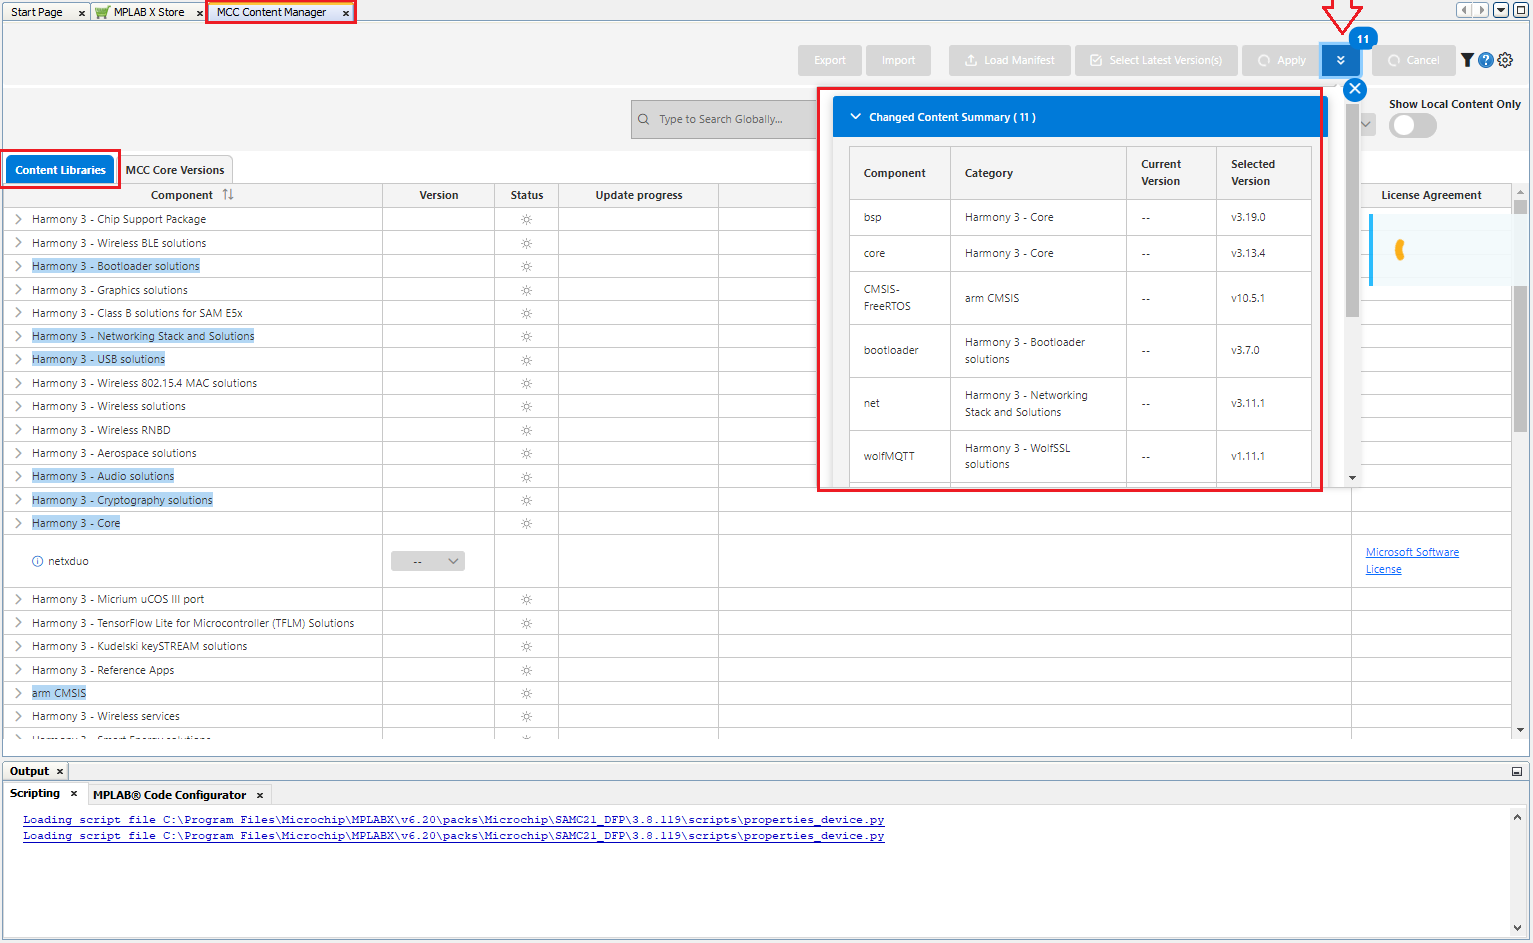
If you need you can select the optional contents like bsp, core, CMSIS-FreeRTOS, etc and click apply, then Content Manager will start downloading these selected packages under the Harmony Content path.
-
Similarly, update the MCC Core Versions to the latest if not already updated.

-
The MCC plug-in will open inside MPLAB® X window
-
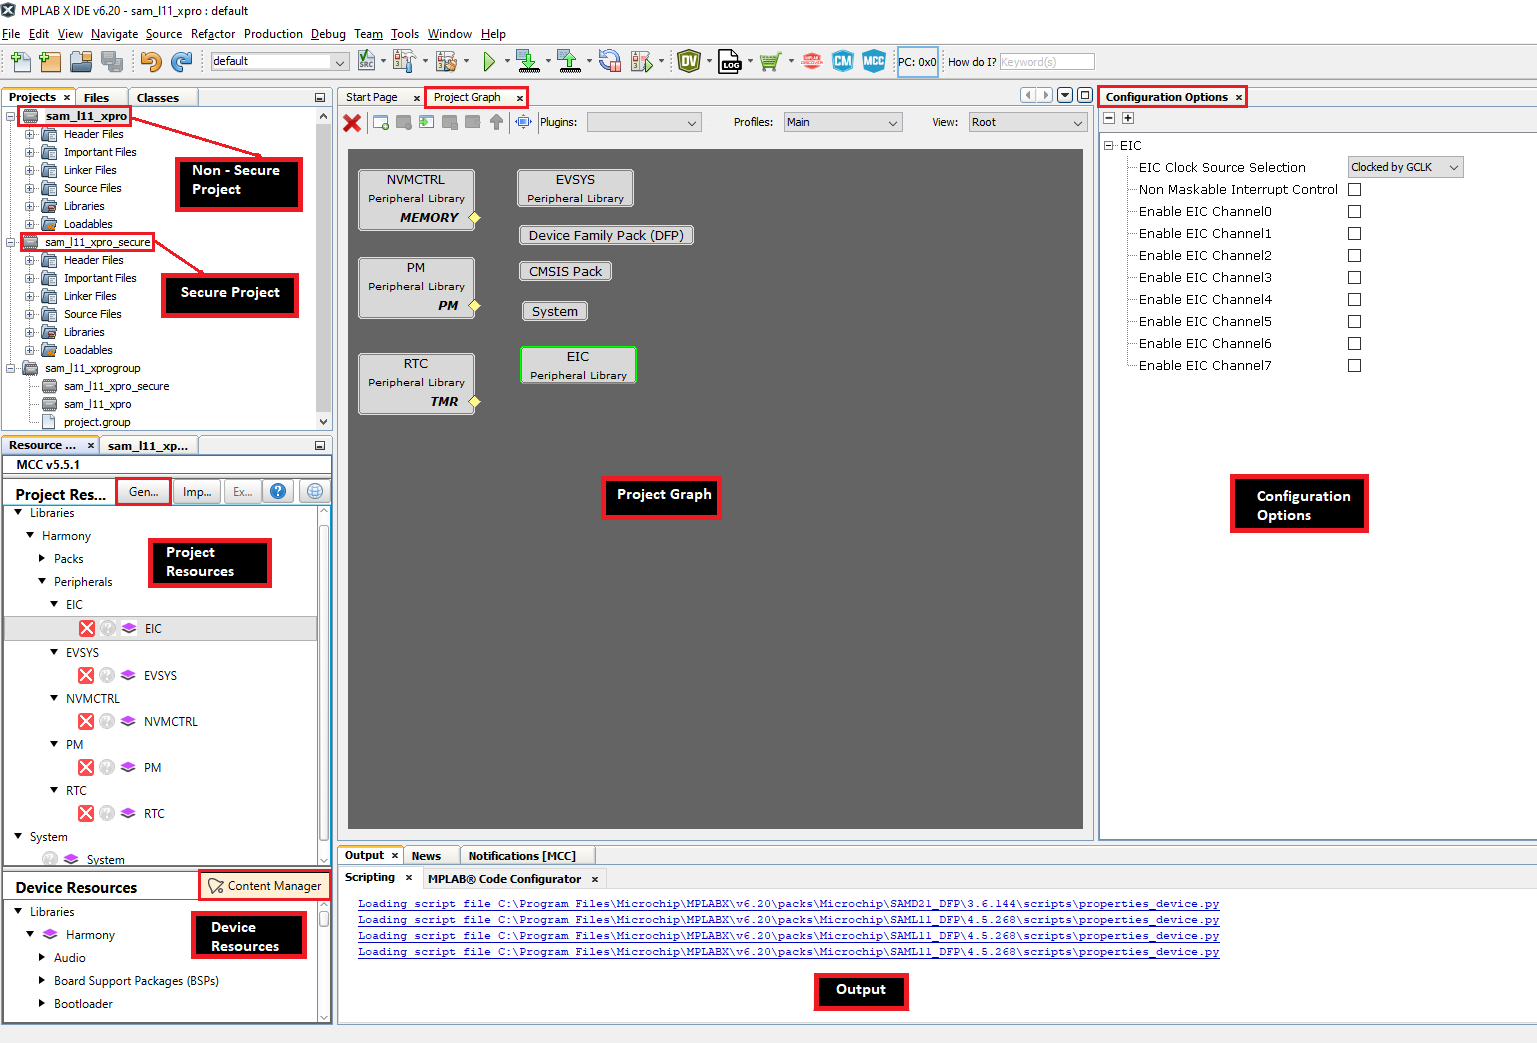
- TrustZone Project uses two projects viz., Secure and Non-Secure Project that work together on the same MCU and offering security isolation between the Trusted and the Non-trusted resources in the device.
- Secure Project:
- Secure project must be selected as Main Project to launch MCC.
- Once the Harmony code is generated, Secure user application should be developed in secure “main.c”.
- “nonsecure_entry.c” and “nonsecure_entry.h” files should be used for the Non-secure to Secure function calls.
- Secure project is a loadable project from the Non-secure project. When Secure Project builds it generates Secure Gateway (SG) library ([configuration name]_Secure_sg_veneer.lib) which will be used by the Non-secure project while building the Non-secure project.
- Non-secure Project:
- Once the Harmony code is generated, Non-secure user application should be developed in Non-secure “main.c”.
- When Non-secure Project builds, it first builds Secure Project and then Non-secure project and generates target binaries to be executed on the device.
-
Running TrustZone Project
Following steps need to be done to run TrustZone project:
-
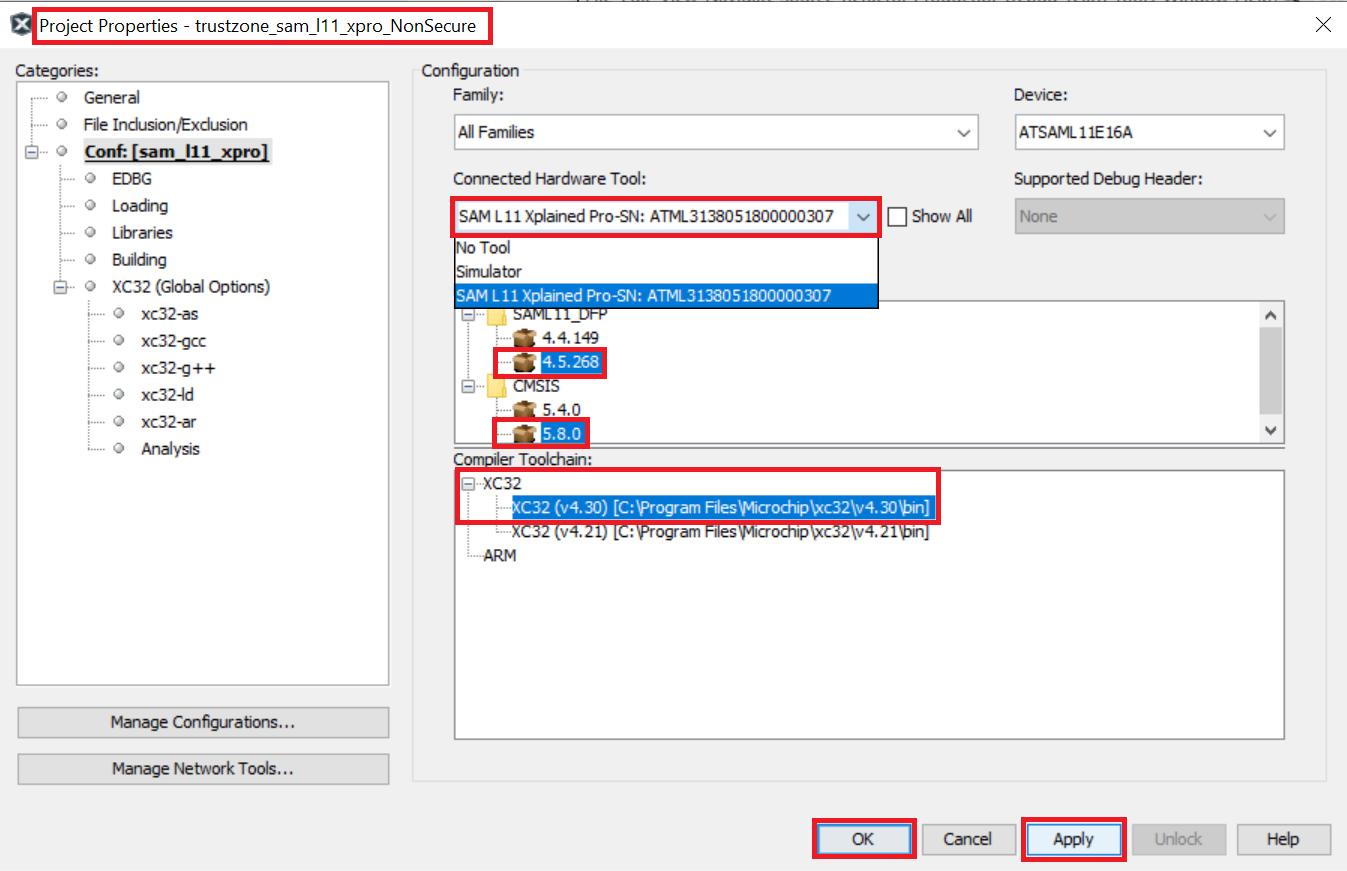
In MPLAB® X Non-secure Project properties, appropriate compiler, hardware tools and DFP should be selected as shown in the figure below.
-
Select Non-secure Project as Main Project, Non-secure Project can be then build and programmed using MPLAB® X “Make and Program Device Main Project” option.
Note
This page has been verified with the following versions of software tools:
- MPLAB X IDE v6.20
- MPLAB XC32 Compiler v4.40
- MPLAB Code Configurator Plugin v5.5.1
- MPLAB Harmony v3 “csp” repo v3.18.5
Because Microchip regularly update tools, occasionally there could be minor differences with the newer versions of the tools.
References
- SAML11 Xplained Pro Evaluation Kit User Guide and Datasheet
- Creating the First Application on PIC32CM LSx Microcontrollers Using MPLAB Harmony v3 with MPLAB Code Configurator (MCC)
- Dual Developer Application Development Use Case with TrustZone on SAM L11 Using MPLAB Harmony v3
- Arm® TrustZone® Getting Started Application on SAM L11 MCUs
- How to Set up the Tools Required to Get Started with MPLAB® Harmony v3 and MCC
- MPLAB Harmony 3 Content Manager