
1.3 OTA Boot Loader
This example acts as loader of OTA image (downloaded using OTA process) to load it to device memory .
Description
This bootloader project can be used by user to program an image , which is downloaded through OTA process. It is required to build this project first using its IDE (MPLABX) before building OTA application, as the image of the bootloader will be integrated with the "wifi_ota_app_upgrade" application image.
During boot-up, bootloader will check if any new valid image available in the external flash. If available, it chooses the newly (latest downloaded) available image in the External flash (sst26vf) and program it to Program-Flash area of the device. Bootloader uses SPI protocol to program the image from the external flash.
If there is no new downloaded image present in the external flash, bootloader will handover the control to current application present in the program-flash area and application will start executing.
For more details , Please follow documentation provided for Over The Air (OTA) firmware update System Service
Securing OTA by verifying Images in Bootloader
We have implemented 2 configurations of OTA Bootloader to perform signature verification of images:
In software using Wolfcrypt (ota_booloader_wolfcrypt.x)
This configuration uses
wolfcryptlibrary, to verify siganture of image.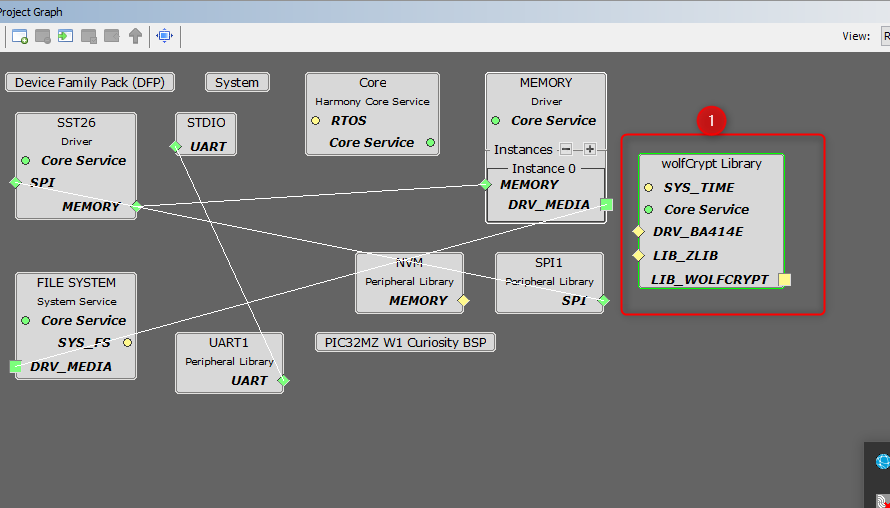
User need to provide public key in the form of array in
pub_key.hfile. Array holds theDERencoded public key. The name of the array should bepubKey[].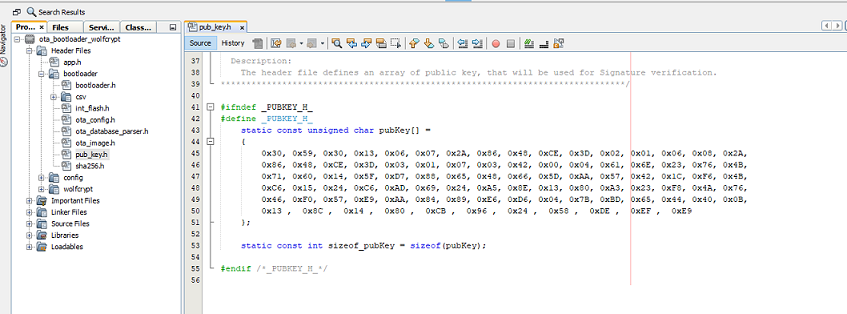
For development and testing user may use
key2heder.pypython file present intoolsfolder of bootloader project. User follow below steps:Copy the
key2heder.pyfile and file containing public key to a particular folder.Use below command from command prompt:
python key2header.py [file containing public key]e.g. : python key2header.py ECC_prime256v1.pub
key_header.hfile will be created in the folder. This file contains an array.Copy this array and paste it in
pub_key.h
In Hardware using Trust Flex device (ota_booloader_trustflex.x)
This configuration requires
trustflexdevice for signature verification. For provisioning of trust flex device and other hardware details please followProvisioning TrustFlex parts for OTA FW Verificationbelow.In MHC,
ATECC608component is configured for signature verification.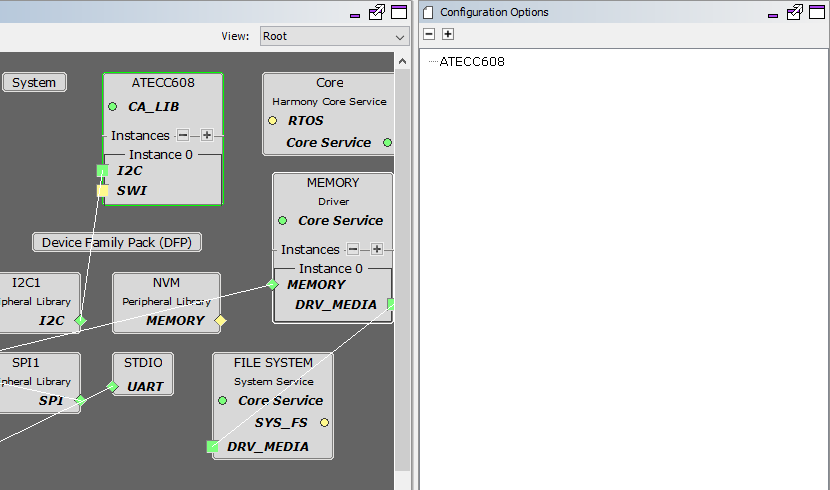
Provisioning TrustFlex parts for OTA FW Verification
ATECC608 based Trustflex can be used to perform secure firmware verification. The steps to provision it using TPDS2 is documented here.
Setup TPDS V2
Setup TPDSV2 following the steps at https://microchipdeveloper.com/authentication:trust-platform-v2
Make sure that you update TPDS after installation.
Hardware Setup
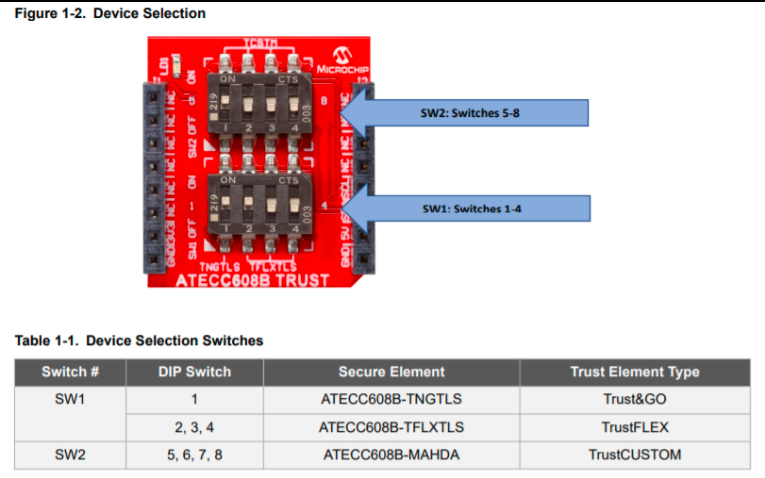
Plug in the DT100104 click board into the microbus interface.
Make sure that you flip all DIP switches other than SW1:2 in click board to OFF position. This will configure the board to expose the TrustFlex device over the I2C Bus.
Device Firmware
TPDS talks to the trust elements using the KitProtocol. So, before using TPDS to provision TrustFlex with the PIC32MZW1 device , we need to flash the KitProtocol firmware into the dev-board.
To update the kit-protocol firmware to use I2C1 instead of the default I2C2 (connected to the onboard TnG module), change HAL_I2C_I2C2 defined in hal_i2c_harmony.h file of the kit protocol project to HAL_I2C_I2C1.
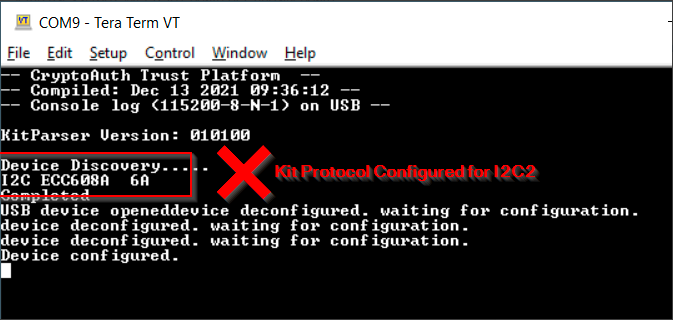
When the firmware boots-up, the UART console (15008N1) will display the devices detected.

Loading the Public Key for FW verification (Provisioning)
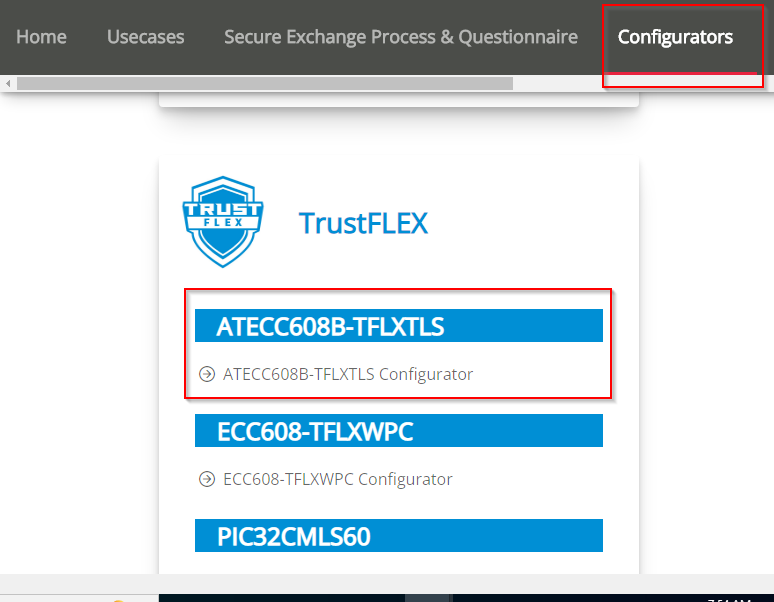
Open TPDS and select ATECC608-TFXTLS configurator under the "Configurators" Tab.
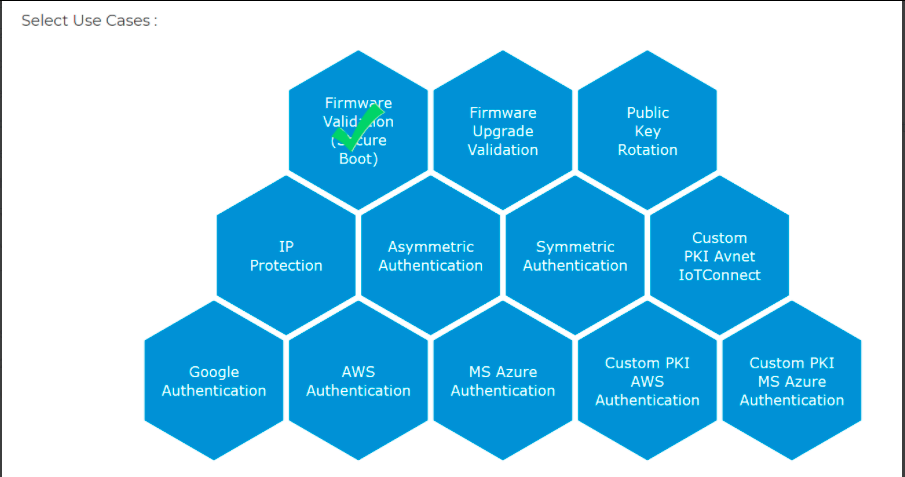
Select the Firmware Validation (Secure Boot) usecase from the next screen
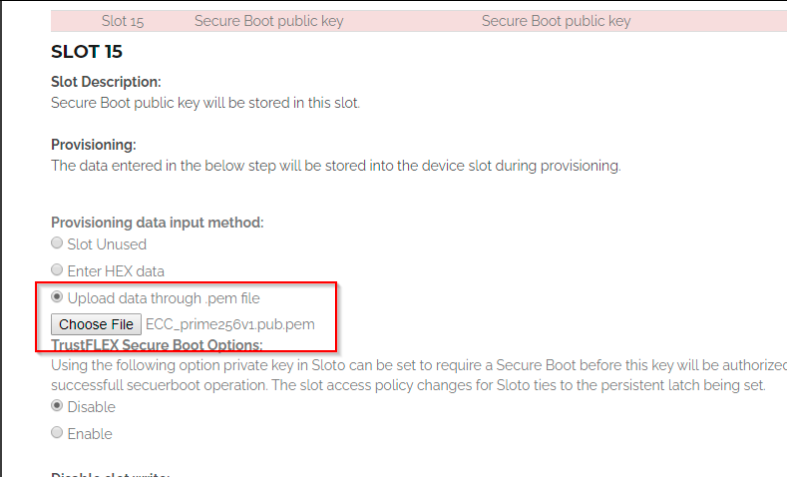
Load the public key into Slot 15
Generate a provisioning package and use it to provision the sample.
The attached kit with the trustFlex device mounted on it will be automatically detected and provisioned.
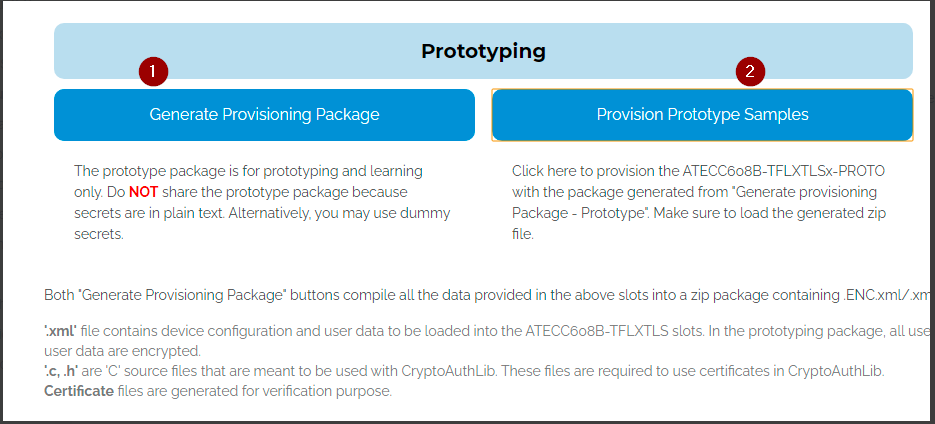
You can now use the device to verify image signatures in the bootloader.
Enabling Secure OTA
By default, secure ota option will be disabled. To enable it , user need to follow below steps.
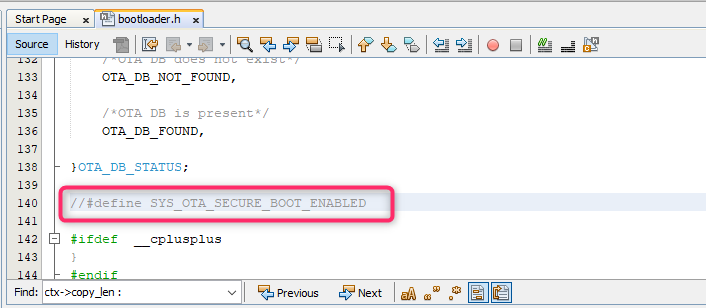
Enable
Secure OTA Functionalityas described inconfigure Advances Configurationsection of link.Define "SYS_OTA_SECURE_BOOT_ENABLED" in "bootloader.h" of bootloader project. User can simply uncomment line of code in "bootloader.h" as shown in below image :
Follow steps describe in
Required steps for Secure-otaof this document.
Generating Signature
For generating signature please refer Generating Signature section of usage manual, which is part of ota system component.
Required steps for Secure-ota
Generate
private keyusing commandopenssl ecparam -genkey -name prime256v1 -noout -out ECC_prime256v1.keyGenerate
public keyusing commandopenssl.exe ec -in ECC_prime256v1.key -pubout -out ECC_prime256v1.pubIn case of
ota_booloader_wolfcrypt.x, public key should be provided inpub_key.hheader file , as described above inSecuring OTA by verifying Images in Bootloadersection.In case of
ota_booloader_trustflex.x, please followProvisioning TrustFlex parts for OTA FW Verificationas described above.User need to store signature of
Factory imageinto system (External flash). This step should be done after factory image is programmed into device and application is running. This is one time job. Please follow steps provided inVerification of factory imagesection of usage manual, which is part ofotasystem component.Create
OTA imagefollowingGenerating the OTA imagesection of usage manual, which is part ofotasystem component.Generate
signatureofOTAimages using private key, as described above inGenerating Signatureof this document.User need to mention
signaturein Manifest file, please followOTA server JSON manifestsection of usage manual, which is part ofotasystem component.
Using bootloader for Non-secure OTA
User need to undefine macro SYS_OTA_SECURE_BOOT_ENABLED in "bootloader.h" of bootloader project to disable Signature verfication of images. In this case, only Digest verification will be done by bootloader.
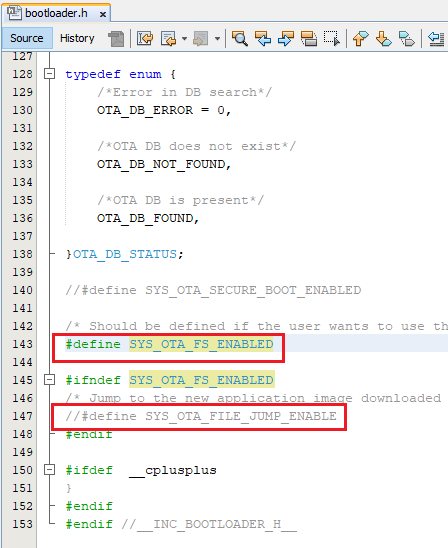
Disabling File system in Bootloader code
The File system can be disbaled only in the bootloader, ota_booloader_wolfcrypt.x. User can disable the File System by undefining the macro SYS_OTA_FS_ENABLED in bootloader.h.
Also user can enbale the feature, jumping to the start address of the new image downloaded via file downloader, by enabling the macro SYS_OTA_FILE_JUMP_ENABLE in bootloader.h. Update the jump address of the new image APP_IMG_BOOT_ADDR_2 in ota_config.h file .This feature is available only with ota_booloader_wolfcrypt.x.
Downloading and Generating Bootloader Code
To download or clone this application from Github, go to the top level of the repository
Path of the project within the repository is apps/ota_bootloader/firmware.
To genearte code, refer to the following table and open the project using its IDE.
| Project Name | Description |
|---|---|
| ota_booloader_trustflex.x | MPLABX project for PIC32MZ W1 Curiosity Board using trustflex click board |
| ota_booloader_wolfcrypt.x | MPLABX project for PIC32MZ W1 Curiosity Board using wolfcrypt library |
Setting up PIC32MZ W1 Curiosity Board
Connect the Debug USB port on the board to the computer using a micro USB cable
Generating BootLoader Code
Open "ota_bootloader" project and launch Harmony3 configurator. Path of the application within the repository is apps/ota_bootloader/firmware.
In case ,
ota_booloader_wolfcrypt.xto be used, provide public key inpub_key.hfile, as described above. This step is not required , in case customer wants to useota_booloader_trustflex.x.By Default , Secure OTA (verifying signture in bootloader) is disabled. To enable it please follow
Enabling Secure OTAsection as described above.Compile the project using MPLABX