Creating MPLAB® Harmony 3 TrustZone-M Project using MPLAB® X IDE
To create a new TrustZone project, in MPLAB® X IDE, Select File > New Project or click  . The New Project wizard will open. Perform following steps:
- Choose Project:
- In the Choose Project pane, select the Microchip Embedded category.
- In the Projects pane, select 32-bit MPLAB® Harmony 3 Project, then click Next.
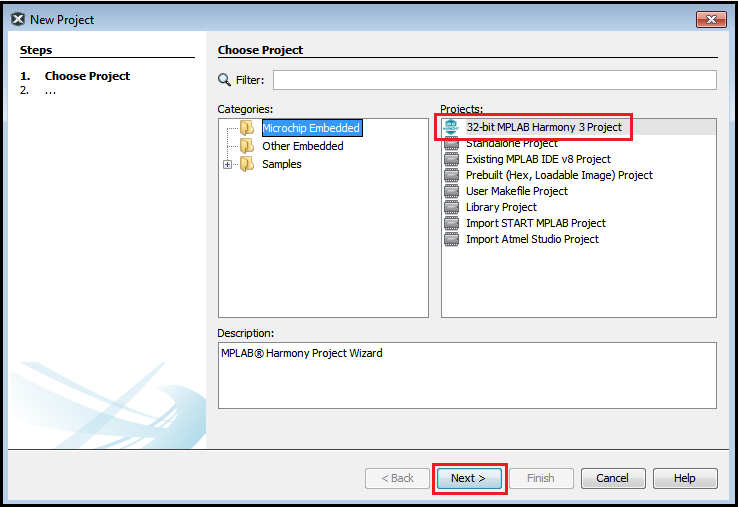
Note: If the 32-Bit MPLAB® Harmony 3 Project type is not listed under the Microchip Embedded category, please download and install MPLAB® Harmony 3 Configurator before continuing with these steps.
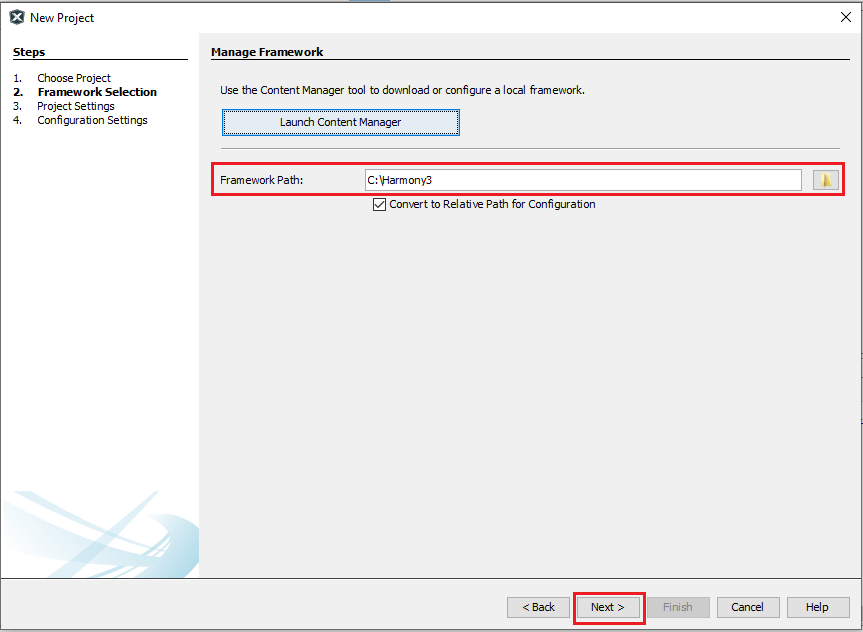
- Framework Selection:
- Provide the framework path where Harmony 3 repositorries have been downloaded, then click Next.
- Project Settings:
- Location: Indicates the path to the root folder of the new project. All project files will be placed in this folder.
- Folder: Indicates the name of the MPLAB® X IDE folder.
- Name: Enter name of the project which you want to see in MPLAB® X IDE, click Next.
- Path: The path information will be updated automatically as and when users make changes to other fields.
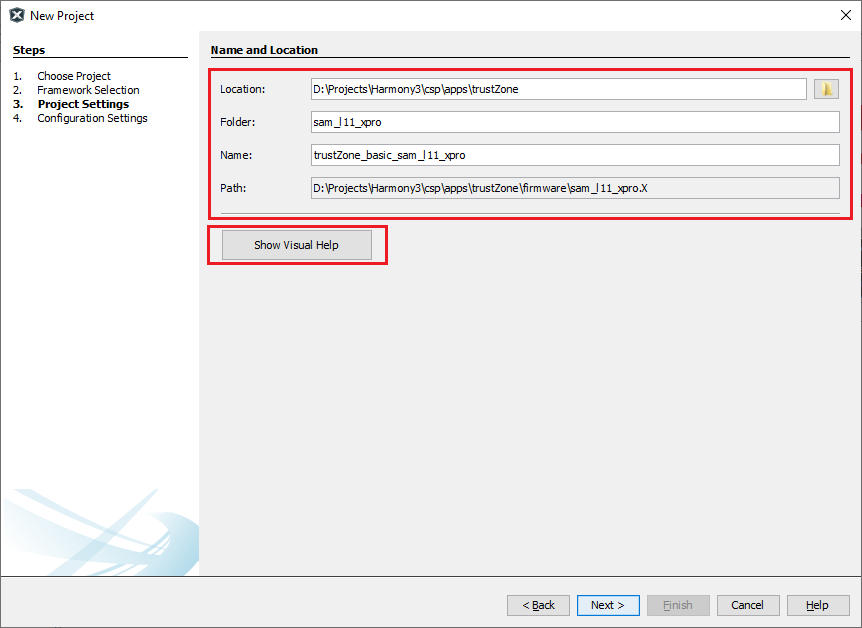
Note: Click the “Show Visual Help” button to open a contextual help window for a detailed description of various fields in the Project Settings.
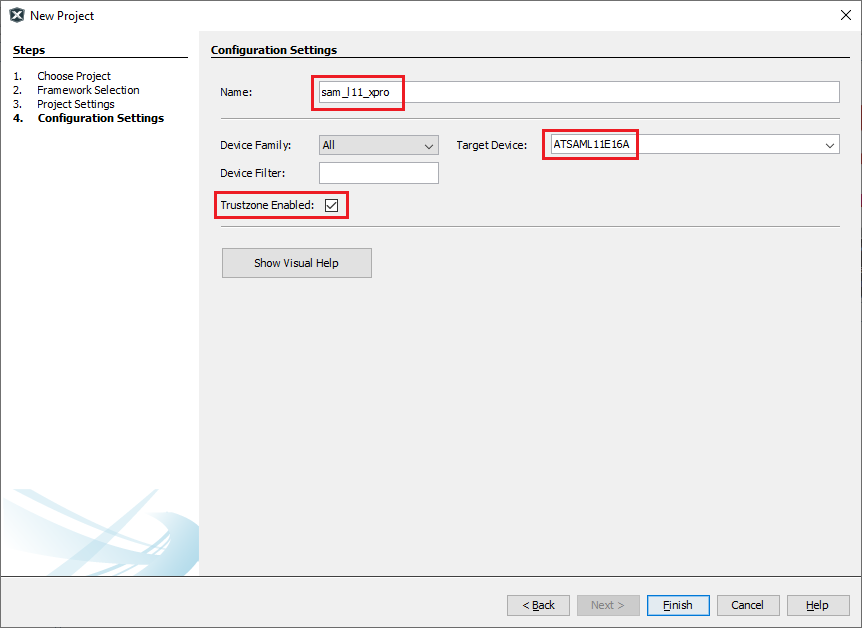
- Configuration Settings:
- Name: Enter the configuration name.
- Target Device: Choose target device
- TrustZone Enabled: Select checkbox and click Finish to launch MPLAB® Harmony Configurator (MHC). After clicking the Finish button, MHC will create Secure and Non-secure MPLAB® X Projects.
- Launching MHC from MPLAB X
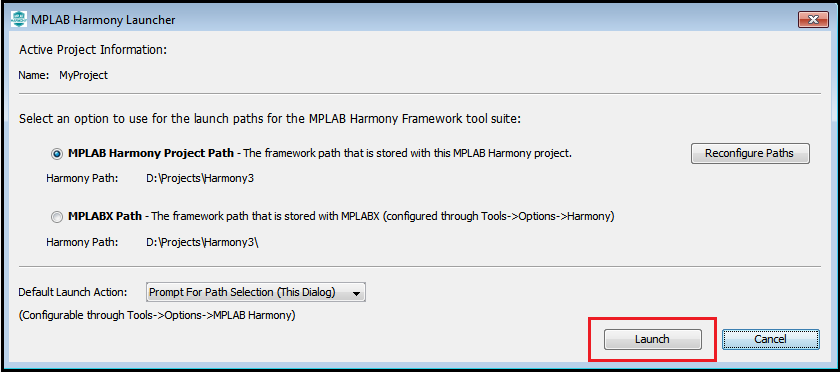
- After selecting the target device, click Finish to launch MHC.
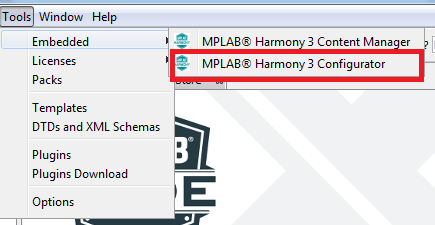
- Users can also launch MHC by selecting Tools > Embedded > MPLAB® Harmony 3 Configurator from the MPLAB X IDE
- If necessary, reconfigure the MPLAB® X Harmony framework paths by clicking the Reconfigure Paths button. Otherwise, accept the default settings and then click Launch.
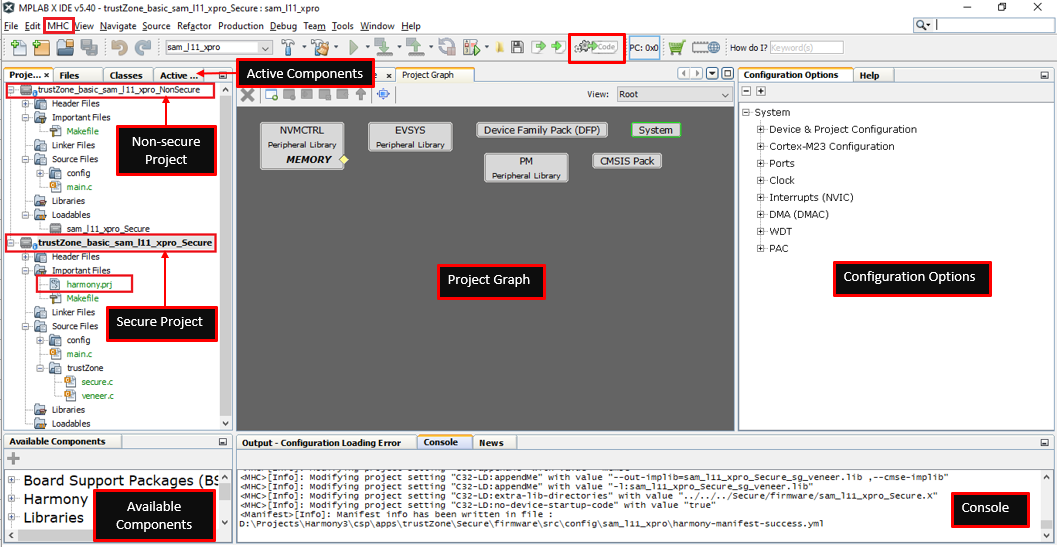
- For TrustZone devices, the MHC Generates two projects viz., Secure and Non-Secure Project that work together on the same MCU and offering security isolation between the Trusted and the Non-trusted resources in the device.
- Non-secure project is selected as Main Project to launch MHC.
- Secure project is selected as a loadable project from the Non-secure project. When Non-secure Project builds, it first builds Secure Project and then Non-secure project and generates target binaries to be executed on the device.
- Launch TrustZone-M Manager
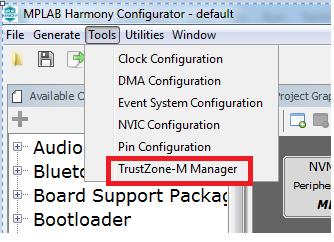
- Launch TrustZone manager
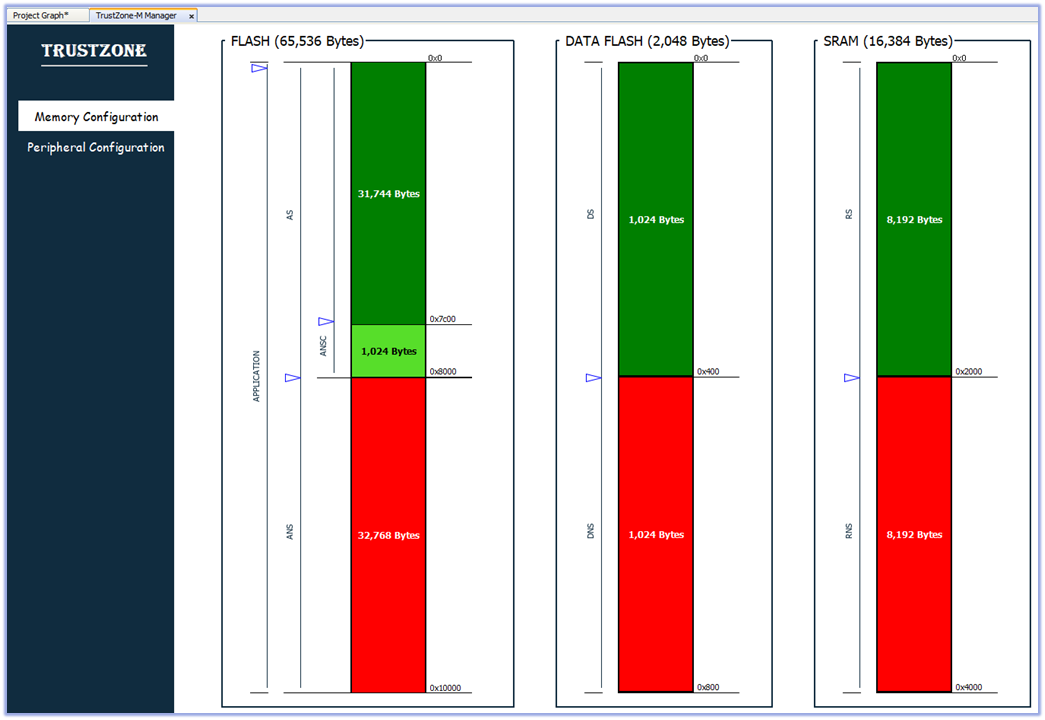
- Memory Configuration
- MHC generates fuse setting in secure project and it programmed as part of secure image to partition memory between secure and non-secure project
- MHC 3 generates linker macros in secure and non-secure project to define the memory region in linker file as per fuse configuration
- Peripheral Configuration
- MHC generates fuse setting in secure project to assign peripheral to non-secure project
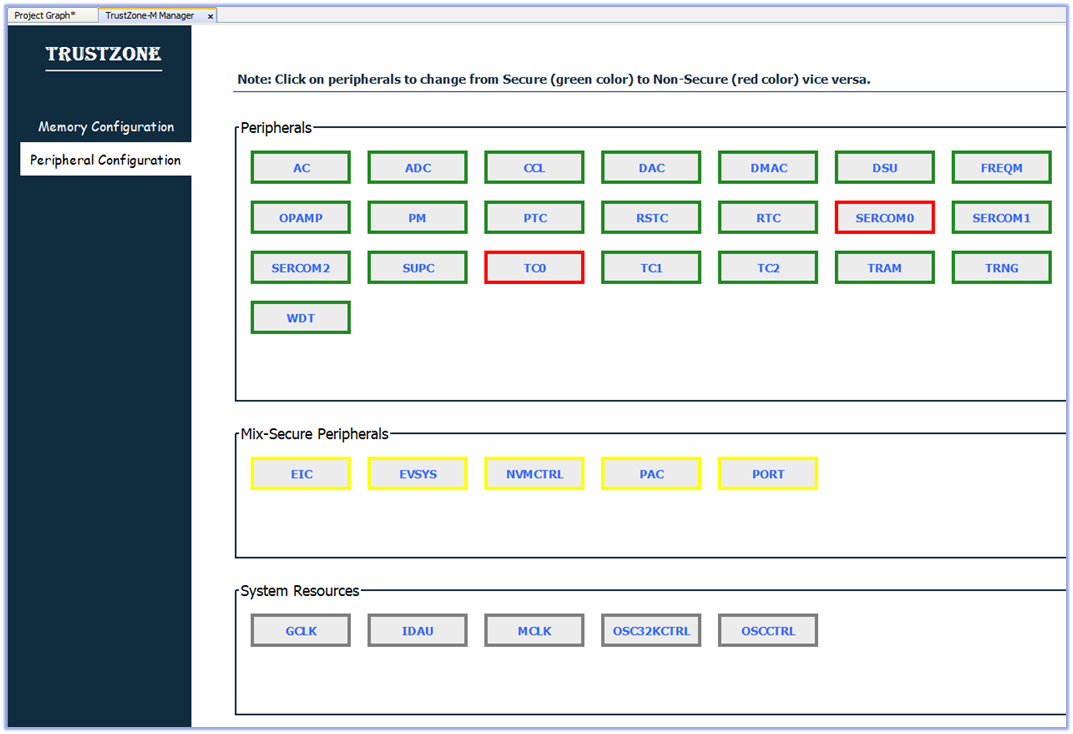
- MHC generates fuse setting in secure project to assign peripheral to non-secure project
Configure and Generate code with MHC
-
Refer to MHC Configuration page for details on how to add, configure and interconnect required software components
-
Once the Harmony code is generated, user application should be developed in “main.c” or “app.c” of the secure and non-secure project.
Build and Program with MPLAB X IDE
- Make Non-Secure Project as main project
- For TrustZone devices, the MHC Generates two projects viz., Secure and Non-Secure Project that work together on the same MCU and offering security isolation between the Trusted and the Non-trusted resources in the device.
- Secure project is selected as a loadable project from the Non-secure project. When Non-secure Project builds, it first builds Secure Project and then Non-secure project and generates target binaries to be executed on the device.
-
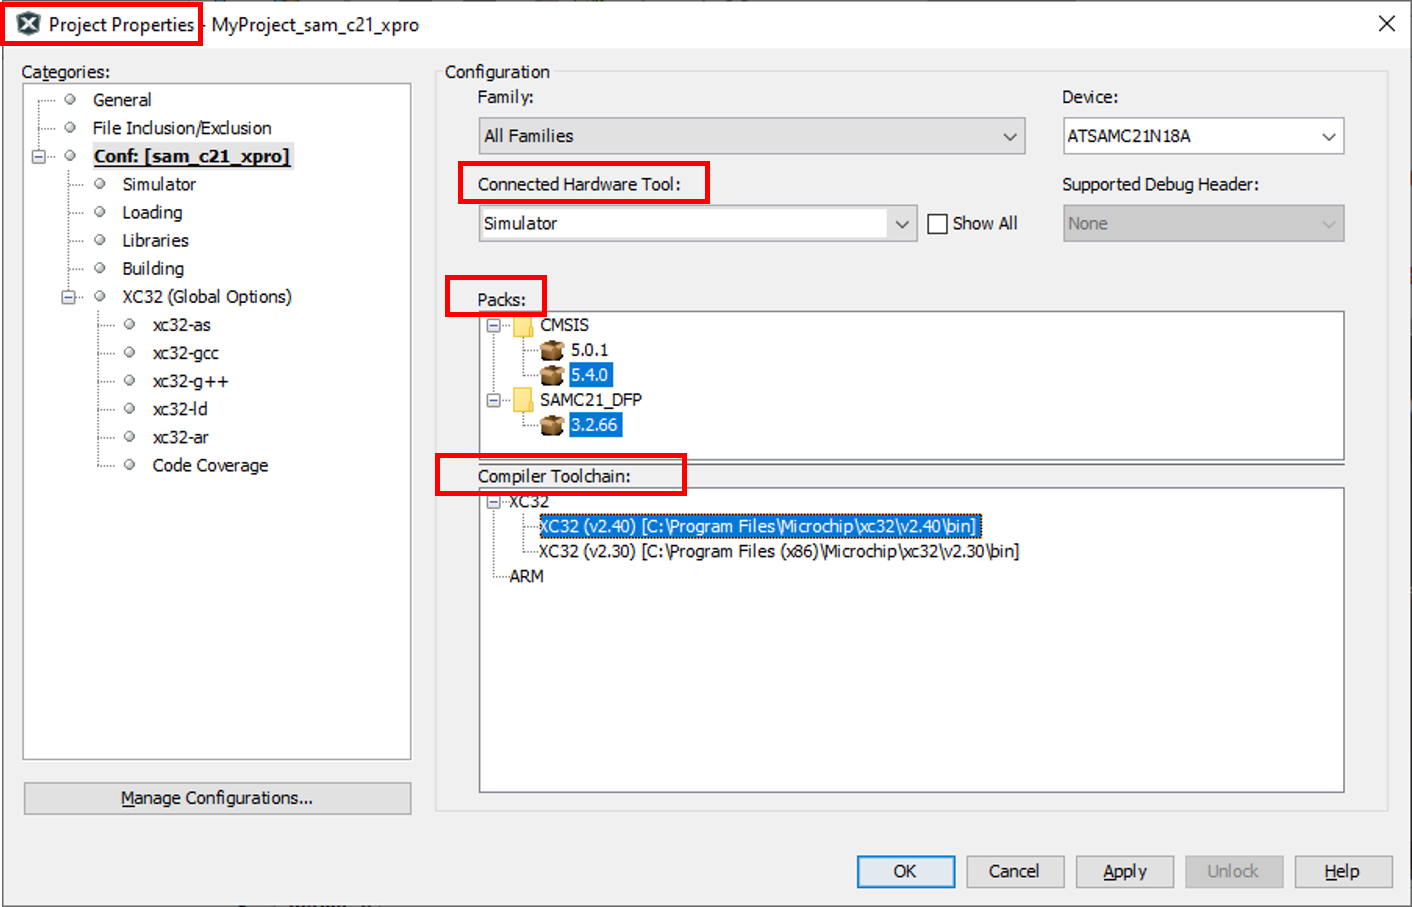
In MPLAB® X IDE, go to File > Project Properties, and make sure that appropriate compiler version, hardware tools and DFP version should be selected.
-
Clean and build your application by clicking on the Clean and Build button as shown below.

- Program your application to the device by clicking on the Make and Program button as shown below.
