12.4.6 OTA Implementation Details - OTAU Client Side
Follow the below step to add the Zigbee OTAU Client functionality in any of the zigbee application.
Pre-requisite
Open any zigbee device type application based on MCC (Example project/ Custom created project).
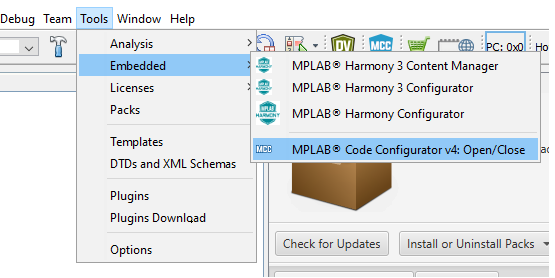
Launch MPLABx Code Configurator (MCC).
The below steps explains only the components/configurations needed for OTA functionality.
Pull-in MCC Components
- Configure "Zigbee Device Type" component as below to enable "OTA Client" capability.
Figure 12-53. . 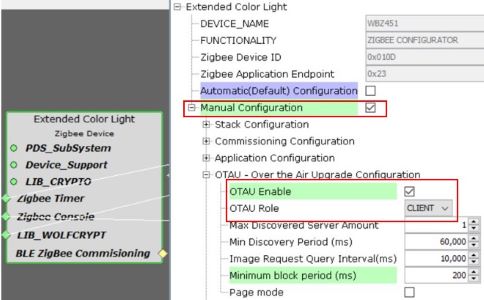 Tip:
Tip:Optional "Page mode" configuration - When enabled OTA client sends page request instead of block request to server (1 Page = 5 Blocks)
Add the "Bootloader Services" dependent component for "Device Support" component in project graph. This component generates the supporting linker file and MPLABX script needed for generating OTA bin file.
Figure 12-54. . 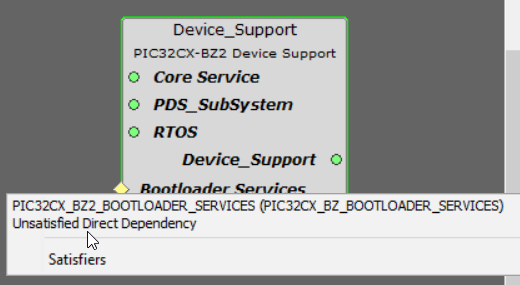
Figure 12-55. . 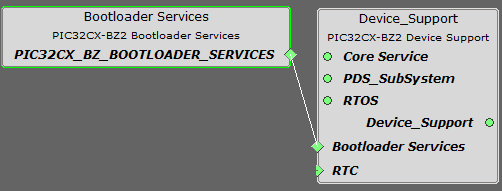
Image Decryption - If the upgradable image is secured (encrypted using AES128 CBC), the below configuration has to be enabled to do decryption of the received image. The AES Key should match with the Key in Zigbee OTA file generation configuration as shown below.
- wolfCrypto Library component - AES-CBC mode is enabled
Figure 12-56. . 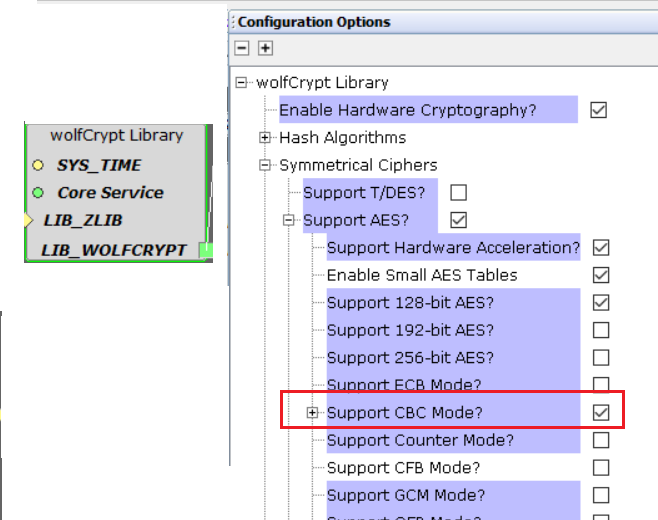
- System component - AES Hardware engine clock is enabled.
Figure 12-57. . 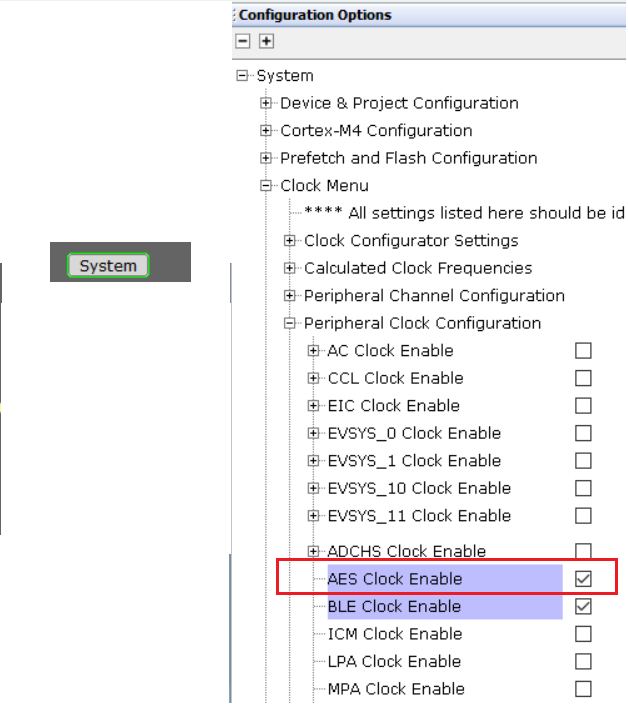
When upgrading the Image, OTA Server PC Tool gets the current running image version from the device. The upgradable image version has to be greater than running image to get upgraded. The version is referred to macro CS_ZCL_OTAU_FILE_VERSION in the code.
Generate Code
Generate Code by Clicking on "Generate" button

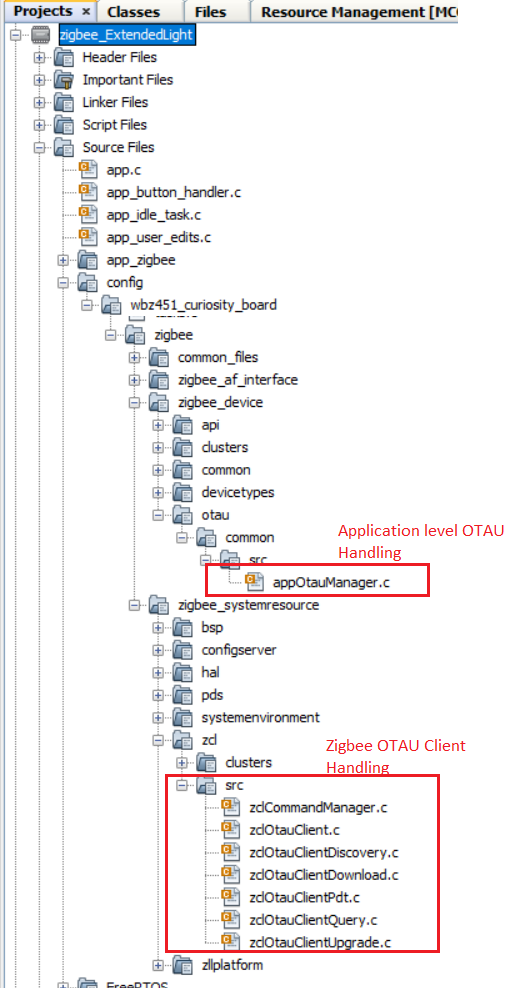
Files and Routines Automatically generated by MCC
After generating the code from MCC tool by clicking Generate, below is the project folder structure.