12.4.6.5 Upgradable image .zigbee file generation
Referring to Project Properties Configuration for Current image , "SignFirmware" and "OTA" bin (.zigbee) generation MPLABX script is added into OTA project. "OTA" window in project properties is used for OTA image generation.
- After making the new upgrdabe application keep the new upgradable image version number not same as current running image version. The version number has to be taken care (defined by macro APPLICATION_VERSION in app.h file) in new firmware as well as "Firmware Rev" in "SignFirmware" window. For example, new image Firmware Rev is chosen as 1.0.0.1 and same in Firmware version in the project.
Follow step 1 in Project Properties Configuration for Current image to open "SignFirmware" properties window.
- Change the "Firmware Rev" and then click on "Apply".
Figure 12-68. . 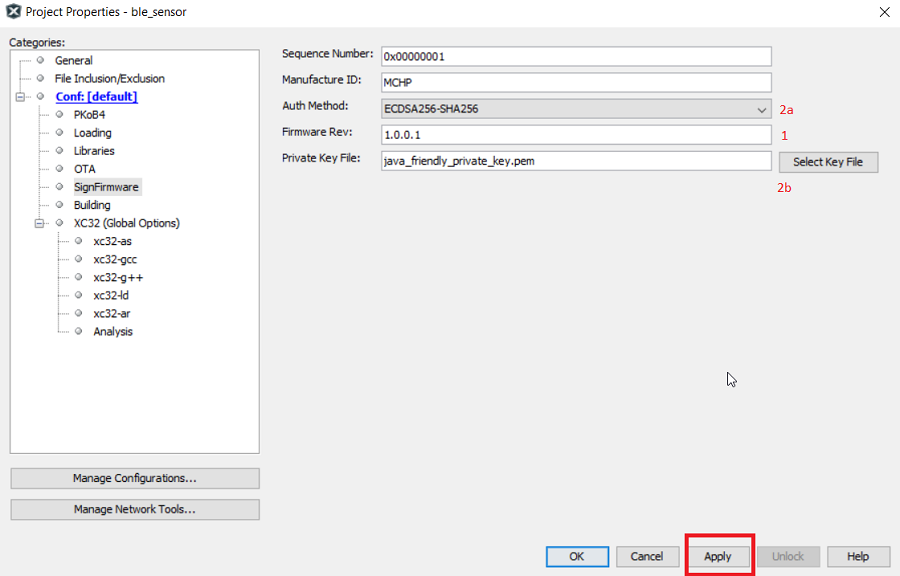
Compile the project.
- Follow the step 1 in Project Properties Configuration for Current image to open "OTA" properties window.
"OTA" window has few configurations.
Figure 12-69. . 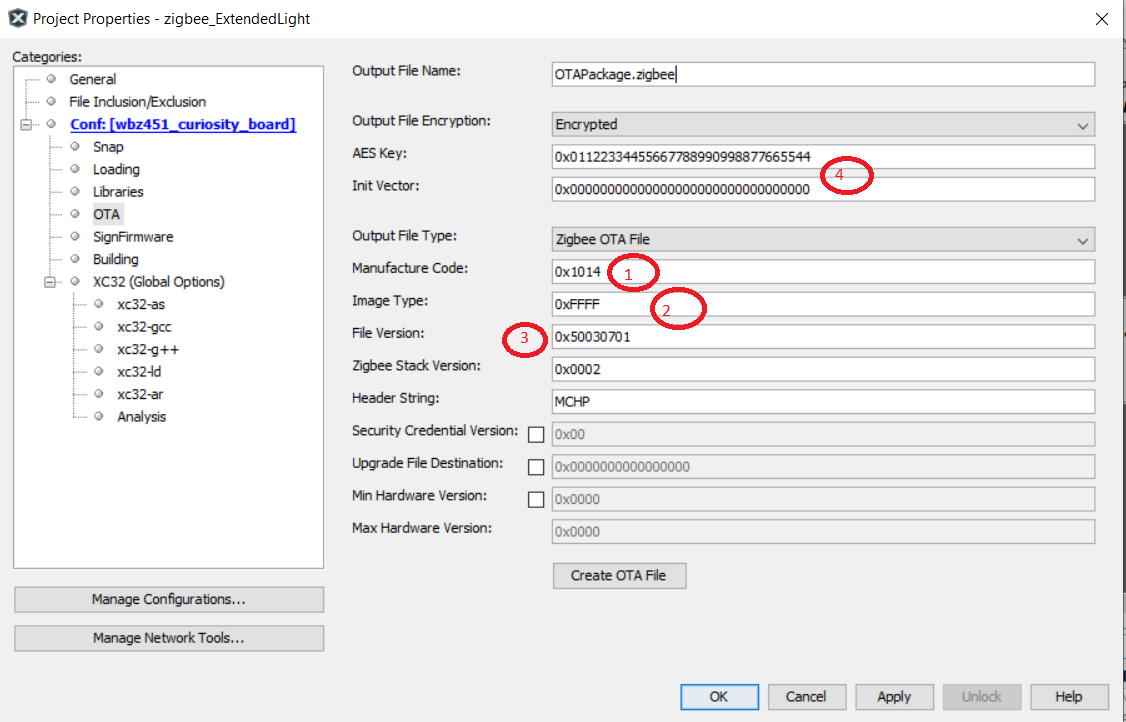
Output File Name - Name of the image.
- Output File Encryption - Key used to encrypt the image. If the upgradable image is secured (encrypted using AES128 CBC), the encryption key has to be present in current application to do decryption of the received image. The AES Key used in Zigbee OTA file generation configuration has to match with the key in current running image as shown below.
Figure 12-70. . 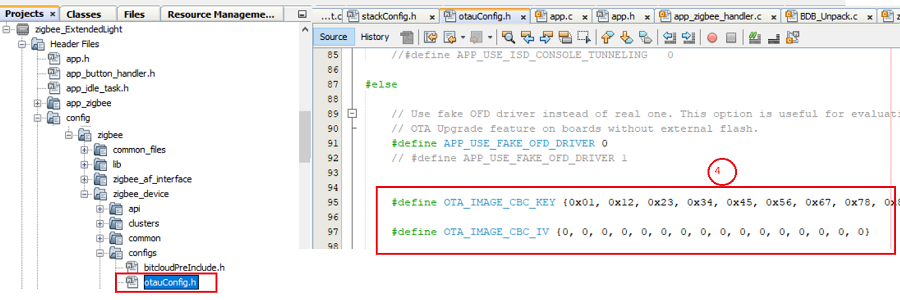
Output File Type - Choose "Zigbee OTA File" type for Zigbee based OTAU
- Manufacture Code - This has to match with the configuration in upgradable image code.
Figure 12-71. . 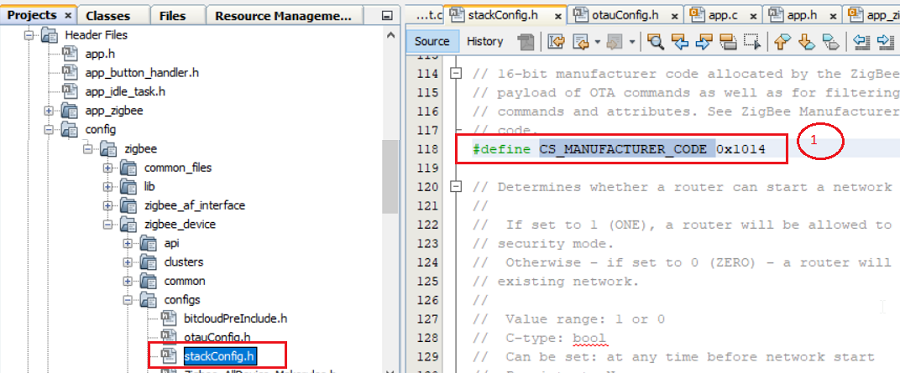
- Image Type - This can be 0xFFFF where image type can be anything, or has to match with configuration in upgradable image code.
Figure 12-72. . 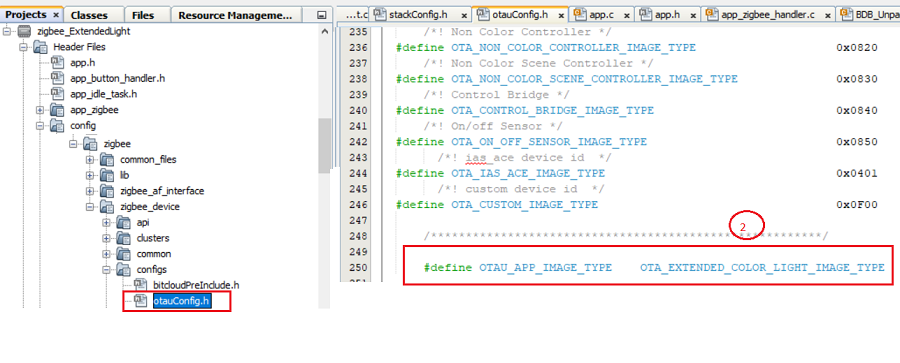
- File Version - This is the application firmware version, and has to be greater than the current running image. It has to match with the configuration in upgradable image code.
Figure 12-73. . 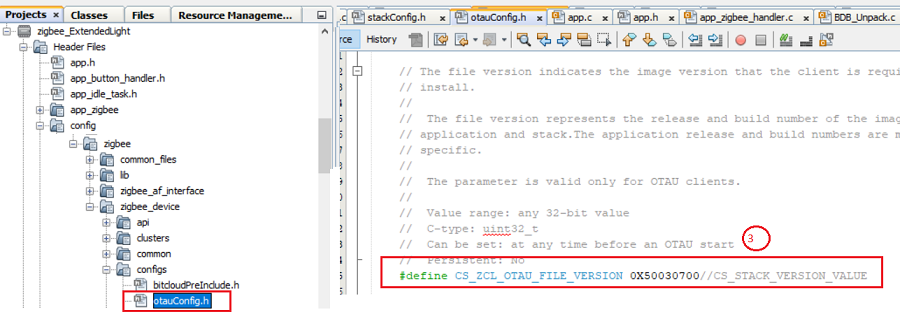
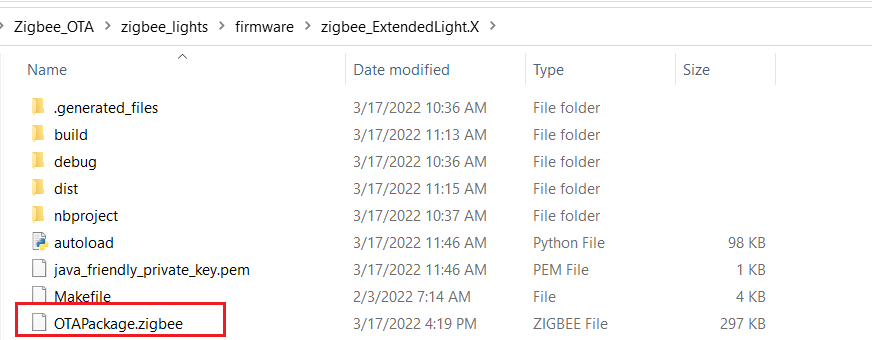
After the configurations, click on "Create OTA File". The Upgradable .zigbee image with "Output File Name" will be created in .X folder. This is the image stored in Zigbee OTAU PC tool to send to OTAU Client.
Figure 12-74. .