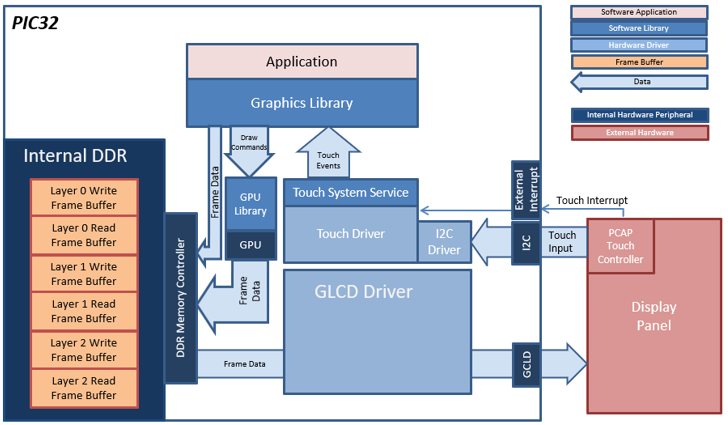
For this configuration, the application uses the Graphics library to render graphics to the display. The Graphics library passes draw commands into the Nano2D GPU Library, which in-turn draws the widgets and images to the three individual write frame buffers (one for each layer) that are stored in an external DDR2. Via the DDR2 Memory Controller, the Graphics LCD (GLCD) display controller peripheral continuously transfers frame data from the all three read buffers onto to the LCD display. The write and read frame buffer pairs are swapped independently as required when the Graphics Library is done rendering to the write frame buffer and GLCD driver signals the GLCD peripheral to change its read location.
The application also features user touch input through the integrated touch screen on the display panel. Touch input from the touch controller goes thru the I2C port, and the Input System Service acquires the touch input information from the touch and I2C drivers. The Input System Service sends touch events to the Graphics library which processes these events and updates the frame data accordingly.
The core timer is used by the application and the Graphics library to manage the movement of the splash screen, the momentum decay of the radial menu and to trigger simulated input events for the Demo Mode.
• Integrated PCAP Touch Input
• Three graphics layer supported via the GLCD peripheral on the PIC32MZ DA device
• Preprocessed Image assets to leverage GPU peripheral supported
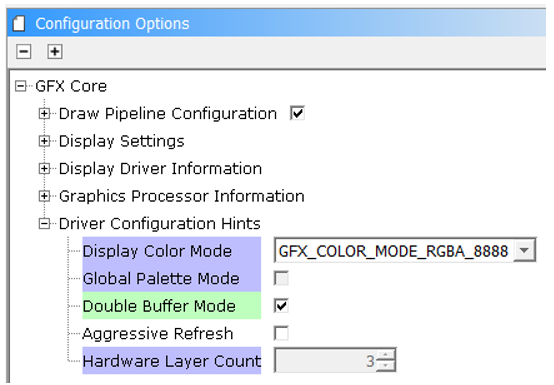
• 32-bit RGBA8888 color depth support (16.7 million unique colors)
• Per-layer frame double-buffering
• Image compression techniques using Run-Length Encoding, PNG, and JPEG
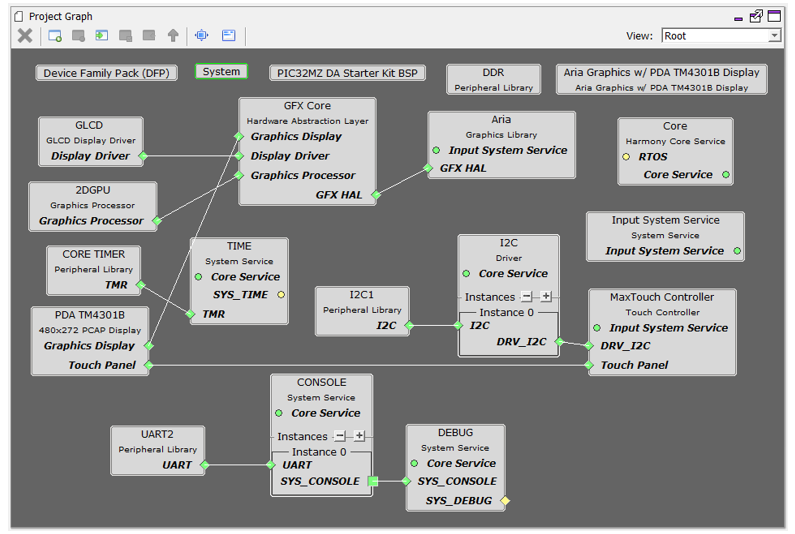
The Project Graph diagram shows the Harmony components that are included in this application. Lines between components are drawn to satisfy components that depend on a capability that another component provides.
Adding the “PIC32MZ DA Starter Kit BSP” and “Aria Graphics w/ PDA TM4301B Display” Graphics Template component into the project graph will automatically add the components needed for a graphics project and resolve their dependencies. It will also configure the pins needed to drive the external peripherals like the display and the touch controller.
The I2C Baud Rate for the I2C1 component to 1,000,000 Hz.

Enable Double Buffer Mode in GFX Core
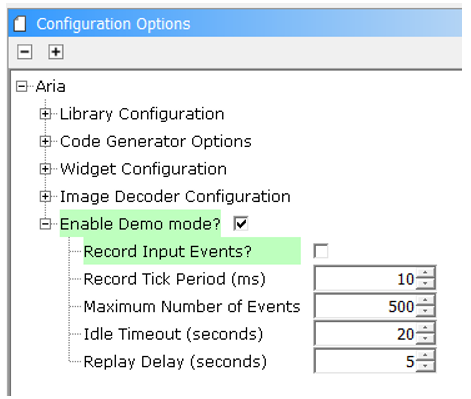
In the Aria component, demo mode is enabled
The parent directory for this application is gfx/apps/aria_radial_menu. To build this application, open the gfx_apps/aria_radial_menu/firmware/aria_rm_mzda_intddr_sk_meb2_tm4301b.X project file.
The following table lists configuration properties:
|
Project Name |
BSP Used |
Graphics Template Used |
Description |
|
PIC32MZ DA Starter Kit |
Aria Graphics w/ PDA TM4301b Display |
Aria GFX on PIC32MZ DA with Internal DDR Starter Kit, MEBII and PDA TM4301b Display |
On the MEB II, the EBIOE and LCD_PCLK (J9) must be jumpered. A connection establishes the GLCD's pixel clock output timing. The external SRAM memory on the board is disabled. The J9 jumper is located on the bottom of the MEB II board, beneath where the starter kit is plugged into the board. Refer to the following figure for the exact location.
![]()
Connect the PIC32MZ DA Starter Kit to the MEB II board

Power up the board by connecting the power adapter to J3 power connector on the MEB II board or a powered USB cable to the USB DEBUG
port on the Starter Kit board
On start-up, the application will display a splash screen:

Subsequently, the demonstration’s main screen will appear:
Using a single-finger horizontal swiping motion, each of the four available selections in the main menu can be accessed. When finger touch input is released, the radial menu will reset such that the image closest to the front is placed front and center. Once the radial menu motion stops and one of the images is front and center, the corresponding mode is shown in the text label. These are: Demonstrated Features, Albums, Portraits, and Rolodex. Only the icon in this prominent position is the selectable option. Press and release the image in the prominent position to navigate to the screen supported by the stated mode.
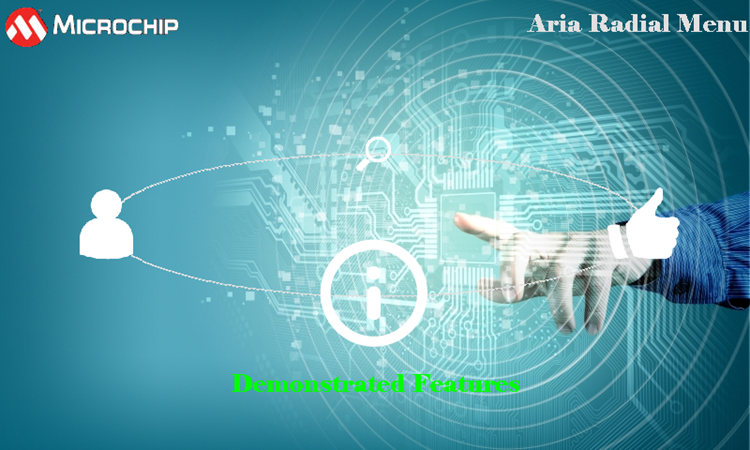
Tapping the icon corresponding to the Demonstrated Features label in the main screen will switch the application to the information screen.
The information screen serves as a screen to list out the features of the demonstration.
- The features are located on layer1. Sliding your finger up or down will cause the feature list to scroll up and down. The MPLAB Harmony logo that is rendered on layer0 is another demonstration of the real-time alpha-blending capability of the GLCD.
- Touching the Microchip logo will trigger the application to the splash screen. Once the splash screen animation has completed, the application will return to the information screen
- Pressing the Home icon will switch the application back to the main menu

While running, if the application does not receive touch input for more than 20 seconds, it will go into demonstration mode. It will play out a set of pre-recorded input events which will lead to the application cycle through all screens and widgets. The application will exit demonstration mode as soon as it receives any user input touch.
|
MPLAB® Harmony Graphics Suite Applications
|