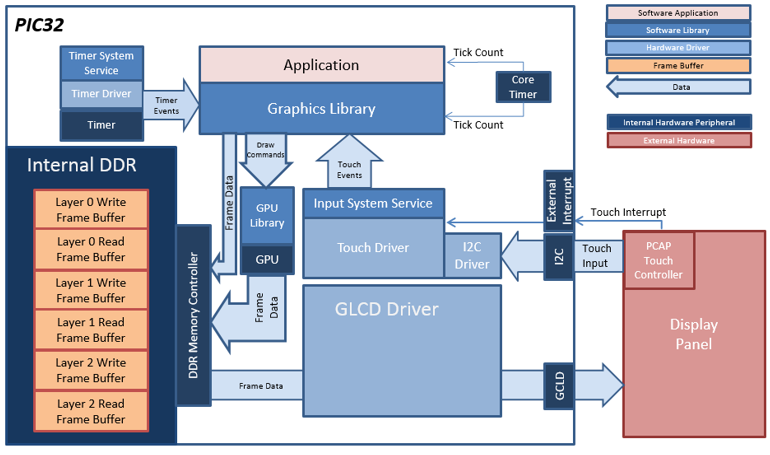
For this configuration, the application uses the graphics library to render graphics to the display. The graphics library passes draw commands into the Nano2D GPU Library, which in-turn draws the widgets and images to the three individual write frame buffers (one for each layer) that are stored in an external DDR2. Via the DDR2 Memory Controller, the Graphics LCD (GLCD) display controller peripheral continuously transfers frame data from the all three read buffers onto to the LCD display. The write and read frame buffer pairs are swapped independently as required when the graphics library is done rendering to the write frame buffer and GLCD driver signals the GLCD peripheral to change its read location.
The application also features user touch input through the integrated touch screen on the display panel. Touch input from the touch controller goes thru the I2C port, and the Touch System Service acquires the touch input information from the touch and I2C drivers. The Touch System Service sends touch events to the graphics library which processes these events and updates the frame data accordingly.
The core timer is used by the application and the graphics library to manage the movement of the splash screen, the momentum decay of the radial menu and to trigger simulated input events for the Demo Mode.
Demonstration Features
• Integrated PCAP Touch Input
• Three graphics layer supported via the GLCD peripheral on the PIC32MZ DA device
• Preprocessed Image assets to leverage GPU peripheral supported
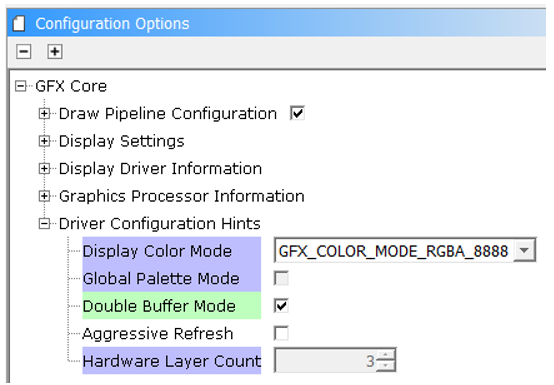
• 32-bit RGBA8888 color depth support (16.7 million unique colors)
• Per-layer frame double-buffering
• Image compression techniques using Run-Length Encoding, PNG, and JPEG
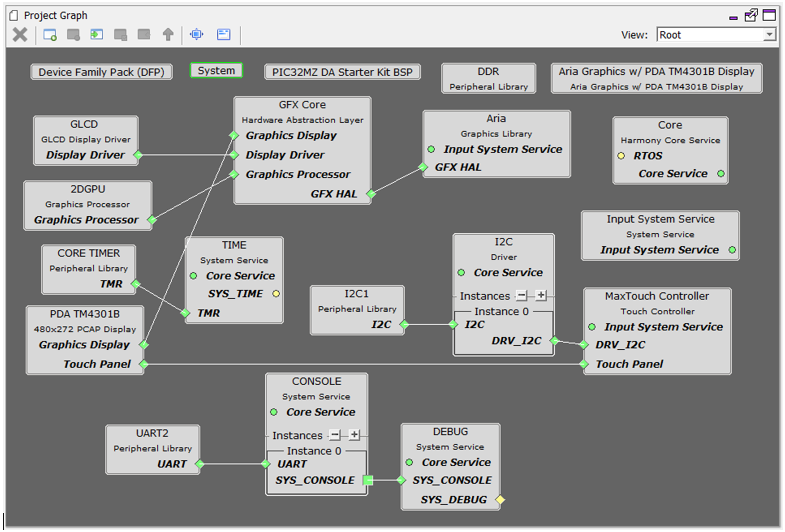
The Project Graph diagram shows the Harmony components that are included in this application. Lines between components are drawn to satisfy components that depend on a capability that another component provides.
Adding the “PIC32MZ DA Starter Kit BSP” and “Aria Graphics w/ PDA TM4301B Display” Graphics Template component into the project graph will automatically add the components needed for a graphics project and resolve their dependencies. It will also configure the pins needed to drive the external peripherals like the display and the touch controller.
The I2C Baud Rate for the I2C1 component to 1,000,000 Hz.

Enable Double Buffer Mode in GFX Core
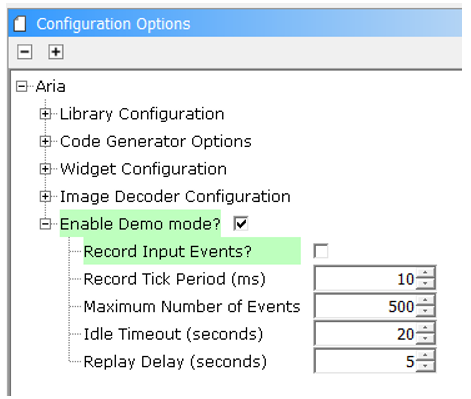
In the Aria component, demo mode is enabled
The parent directory for this application is gfx_apps/apps/aria_infotainment. To build this application, use MPLABX to open the gfx_apps/apps/aria_infotainment/firmware/aria_info_mzda_intddr_sk_meb2_tm4301b.X project file.
The following table lists configuration properties:
|
Project Name |
BSP Used |
Graphics Template Used |
Description |
|
aria_info_mzda_intddr_sk_meb2_tm4301b.X |
PIC32MZ DA Starter Kit |
Aria Graphics w/ PDA TM4301b Display |
Aria Graphics on PIC32MZ DA with Internal DDR Starter Kit, MEBII and PDA TM4301b Display |
 Important! Important! |
This application may contain custom code that is marked by the comments // START OF CUSTOM CODE ... and // END OF CUSTOM CODE. If you use the MPLAB Harmony Configurator to regenerate the application code, use the "ALL" merging strategy and do not remove or replace the custom code. |
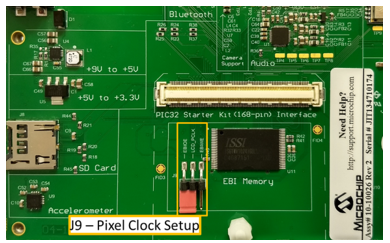
On the MEB II, the EBIOE and LCD_PCLK (J9) must be jumpered. A connection establishes the GLCD's pixel clock output timing. The external SRAM memory on the board is disabled. The J9 jumper is located on the bottom of the MEB II board, beneath where the starter kit is plugged into the board. Refer to the following figure for the exact location.
Connect the PIC32MZ DA Starter Kit to the MEB II board

Power up the board by connecting the power adapter to J3 power connector on the MEB II board or a powered USB cable to the USB DEBUG port on the Starter Kit board
On start-up, the application will display a PIC32 logo, this is the beginning of the splash screen:

The screen will remain on the PIC32 logo for roughly 15 to 20 seconds as images are being preprocessed. This pause only happens one-time at power up. After preprocessing is done, the rest of the splash screen motion will play out, ending with a screen like this one:

Main Screen
After the completion of the Splash Screen, the screen will fade to white during the transition to the main screen.
The main screen will start in the A/C control screen:
Climate Control Mode
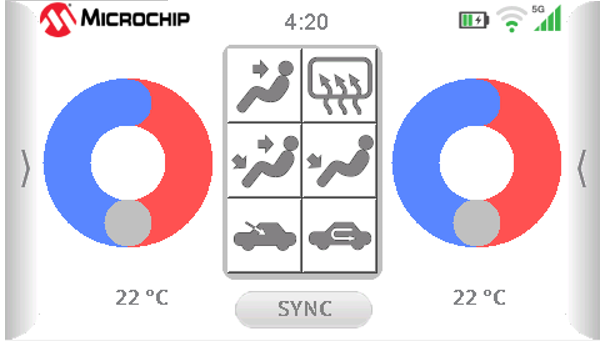
This screen simulates the dual-zone climate control UI of a modern car. The circular gauges as well as the buttons the central buttons are all touch interactive.
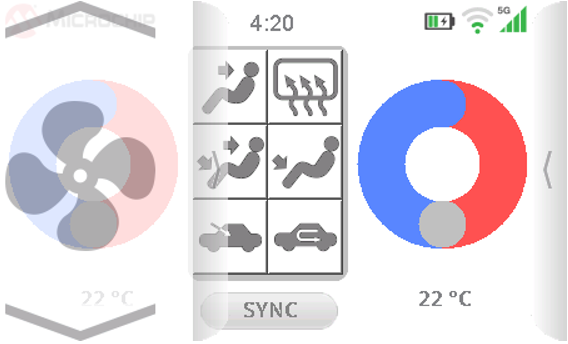
Touching and dragging the grey lids on the left side will bring up the UI mode selector, which rest within a semi-transparent tray. This is a radial menu widget. The UI mode can be changed by sliding the radial menu up/down or by pressing the Up or Down chevron buttons.
Along with the Climate Control mode, there are five modes that the mode selector can access. They are Phone, Music, Bluetooth and Navigation.
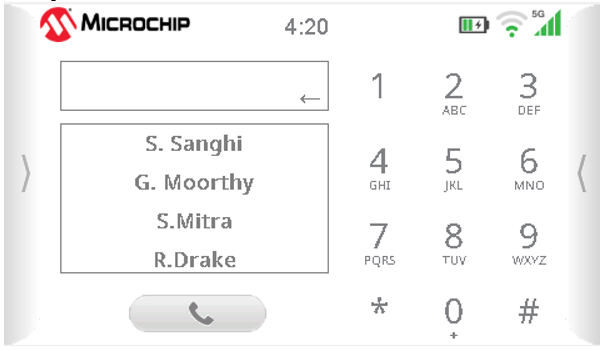
Phone Mode
Phone Mode simulates a Call Screen UI. Pressing any of the dial buttons or selecting any entry in the caller list will put numbers into the text field widget.
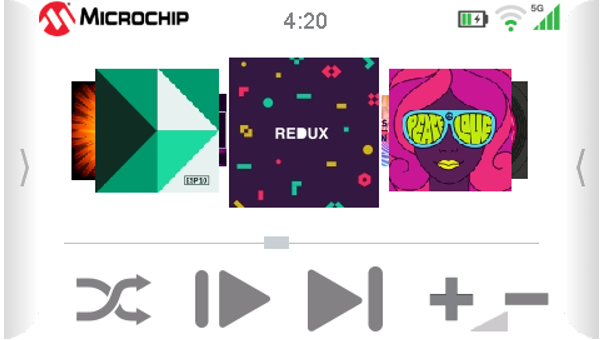
Music Player Mode
Music Mode simulates a Music Player UI. A radial menu widget shows the current music track. Music tracks can be skipped ahead or shuffled by using the corresponding buttons. The tracks can also be selected via touch gesture directly to the radial menu widget.
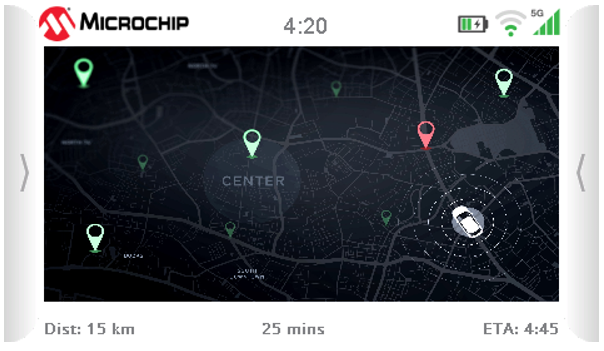
Navigation Mode
Navigation Mode simulates a car Navigation UI. The image plus widget simulates an interactive navigation map. Double-tapping will zoom-in or zoom-out the map. The map can also be zoomed in/out using two-fingered pinch/stretch gesture, as well as swipe to navigate when the image is zoomed in.
Bluetooth Connection Mode
Bluetooth Mode simulates a car Bluetooth device connection UI. The objective of the screen is to show how custom widgets can be constructed using a compound set of button, label and image widgets.

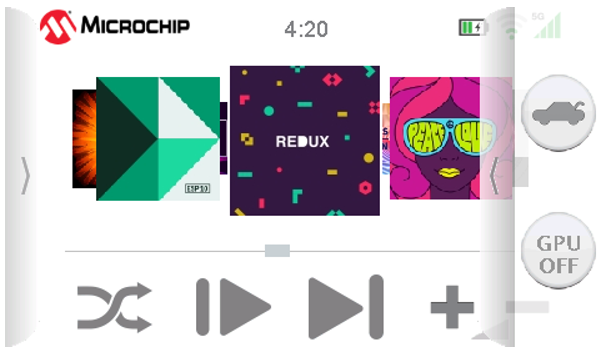
Right Tray Features
Tapping the “Trunk Open” icon corresponding on the right slide-out tray in the main screen will switch the application to the information screen.
There is a GPU ON/OFF button to toggle on and off the GPU at any point while the application is running. This can be used to observe the how GPU hardware acceleration improves the performance of the Aria Graphics Library.
To turn OFF the GPU, press the button when the label reads “GPU OFF”, and vice-versa to turn on. The GPU is turned on by default at power-up.
Information Screen
The information screen serves as a screen to list out the demonstrated features of the demo. It also provides two features.
• The features are located on layer1. Sliding your finger up or down will cause the feature list to scroll up and down as if it’s on an invisible glass
pane. The MPLAB Harmony logo that is rendered on layer0 is another demonstration of the real-time alpha-blending capability of the GLCD.
• Touching the Microchip logo will trigger the application to the splash screen. Once the splash screen animation has complete, the application will return to the information screen.
• Pressing the Home icon will switch the application back to the main menu

Demonstration Mode
While running, if the application does not receive touch input for more than 20 seconds, it will go into demonstration mode. It will play out a set of pre-recorded input events which will lead to the application cycle through all screens, UI modes and widgets. The application will exit demonstration mode as soon as it receives any user input touch.
|
MPLAB® Harmony Graphics Suite Applications
|