Open any BLE application based on MCC (Example project/ Custom created project)
Launch MPLABx Code Configurator (MCC)
Figure 12-43. MPLABx Code
Configurator
Pull-in MCC Components
The following steps explain the components/configurations needed for OTA functionality alone.
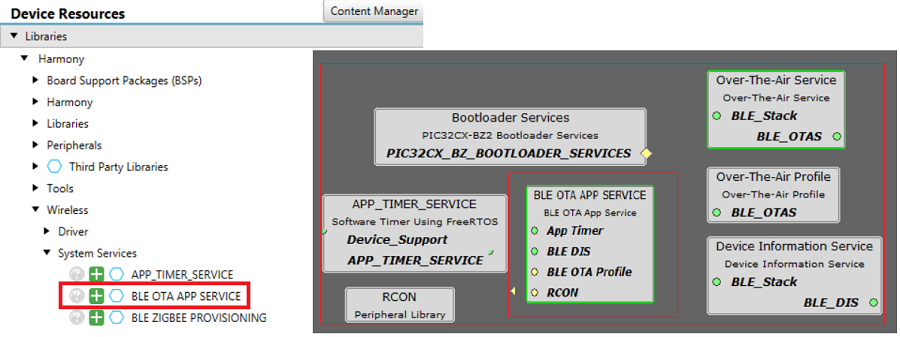
Click on "+" symbol "BLE OTA APP SERVICE" component from "Device Resources" of MCC to project
graph. When the component is added, the dependent components also getting added
automatically. Accept Dependencies or satisfiers, select "Yes" in order to add the
dependent components.
Configure "BLE OTA APP SERVICE" component as the following, based on the need:
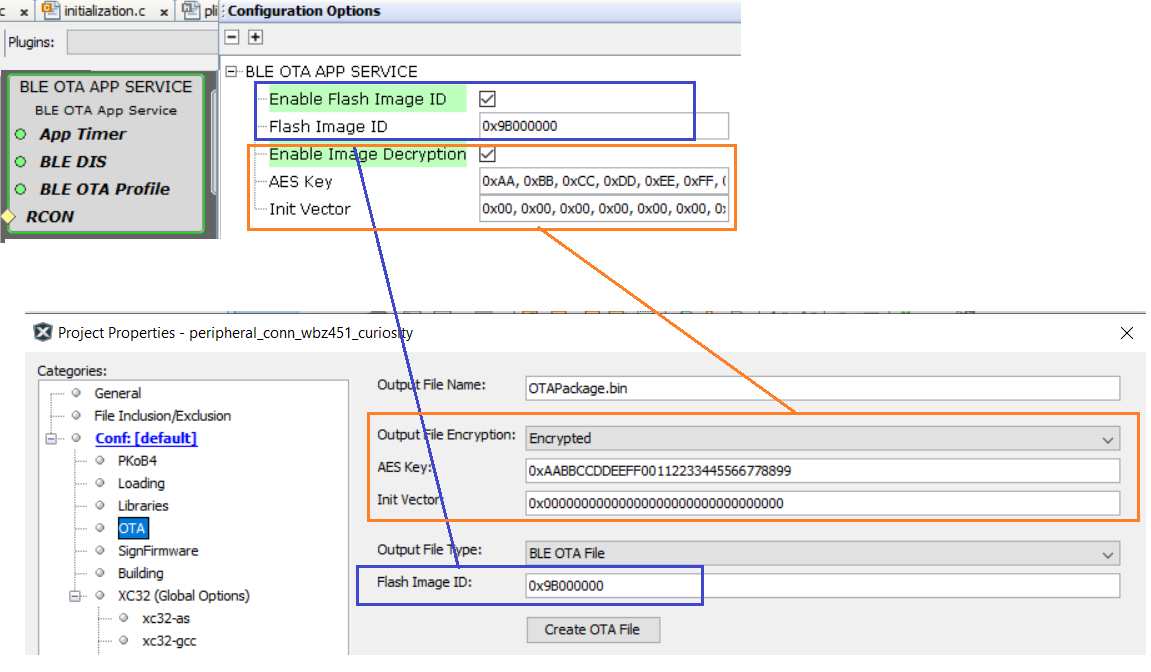
Enable Flash Image ID - This
option checks for Image ID. If this option is enabled the upgradable image
must have the same ID of current image, only then OTA upgrade procedure will
happen. Use the same value as in BLE OTA DFU bin file generation
configuration as shown below.
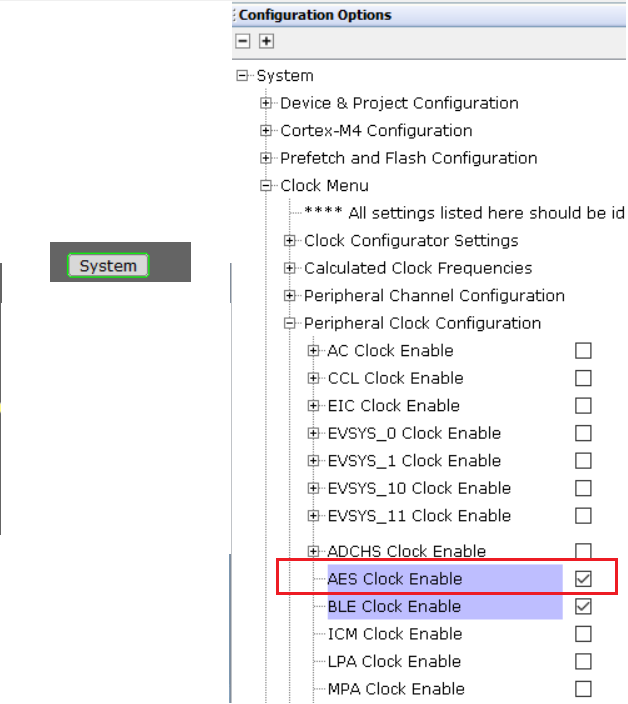
Enable Image Decryption - If
the upgradable image is secured (encrypted using AES128 CBC), this
configuration has to be enabled to do decryption of the received image. The
AES Key must match with the Key in BLE OTA DFU bin file generation
configuration as shown below.
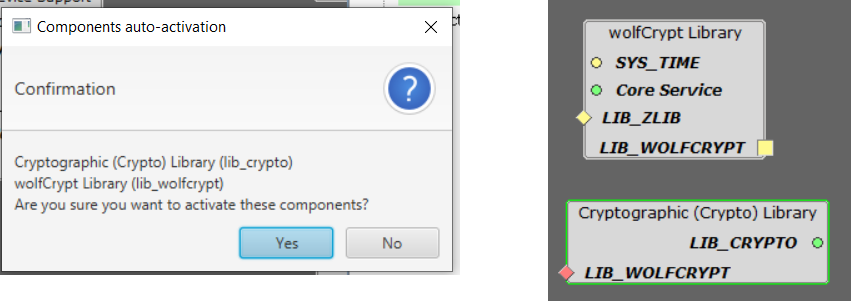
When the Image decryption option is enabled in the above step, the dependent crypto components will get added (if not already present in project graph). Accept Dependencies or satisfiers, select "Yes" in order to add the dependent components.
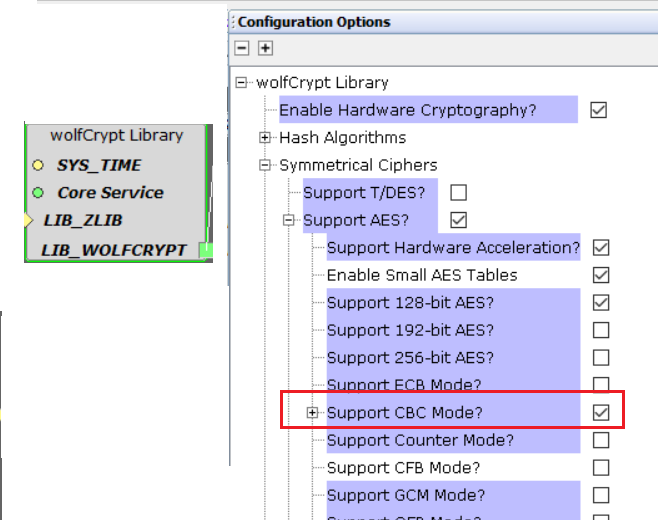
Verify the following configurations:
wolfCrypto Library component - AES-CBC mode is enabled.
System component - AES Hardware engine clock is enabled.
Verifying Configurations
All the required configurations are automatically done when the "BLE OTA APP SERVICE" component is added. Verify if the Project Graph window has all the expected MCC configurations
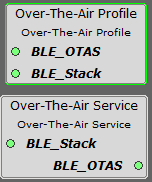
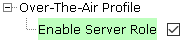
BLE OTA profile and OTA Service Components - Enable Server Role. This
module generates the code needed for MCHP defined BLE OTA profile and
service.
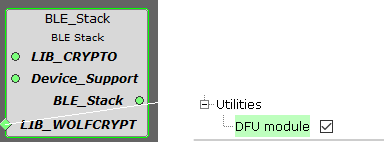
BLE_Stack component - DFU Module enable - This module generates the code
needed for device firmware upgrade middleware for writing the OTA image into
Embedded Flash.
BLE_Stack component -
Advertising and Scan data payload is configured for manufacturer specific service
UUID and local name. BLE OTA Microchip Data (MBD) mobile app expects service UUID as
"0xFEDA" to filter the devices.
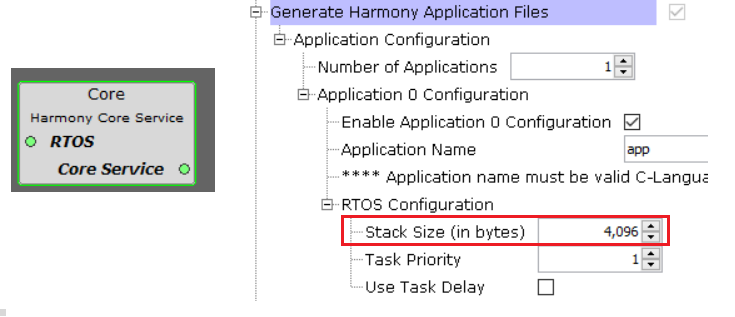
FreeRTOS stack size - The minimum stack size required by OTA feature is 3584
bytes. For example if the original stack size needed for user application is 1024
bytes, then set the total stack size as 1024 + 3584 = 4608 bytes.
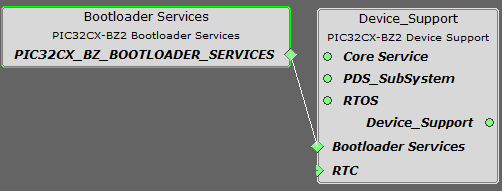
Bootloader Services component
- This component generates the supporting linker file and MPLABX script needed for
12.3.6.6 Upgradable image .bin file generation. Also,
the crypto API's in bootloader section is called to verify the authenticity
(signature verification) of the received image before performing device reset.
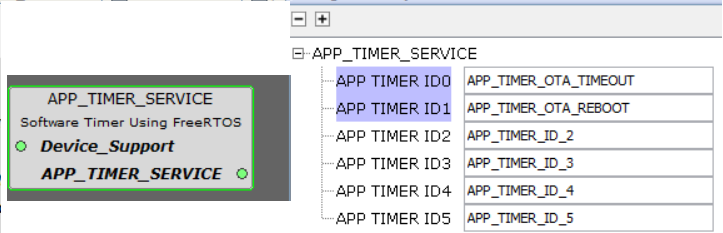
App Timer Service component - The BLE OTA procedure requires error handling
and initializing the state in case of failure in receiving the image. There are 2
software timers based on FreeRTOS systick is used. APP_TIMER_OTA_TIMEOUT for error
handling. APP_TIMER_OTA_REBOOT for resetting the device after successful image reception.
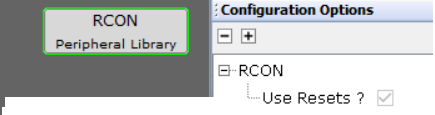
RCON component - As mentioned above APP_TIMER_OTA_REBOOT timer is used for
resetting the device after successful image reception. Device reset is performed
using SW reset in RCON module.
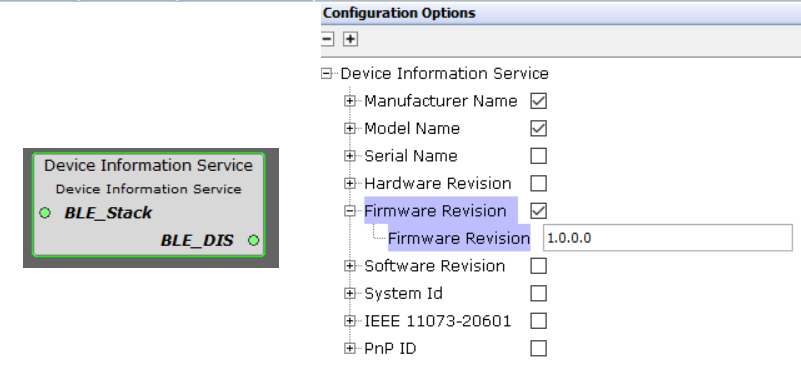
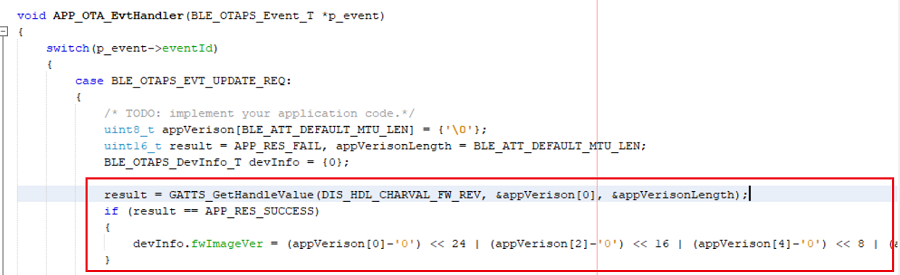
DIS BLE Service - Device Info
Service is BT SIG defined service. This service can be used to hold the firmware
version. When upgrading the Image, OTAU manager gets the current running image
version. OTA server in device can use firmware version from DIS and send to OTAU
manager. Using the FW from DIS is just optional.
If DIS is not needed for customer application, DIS component can be removed
and the below code for sending firmware version must be modified.
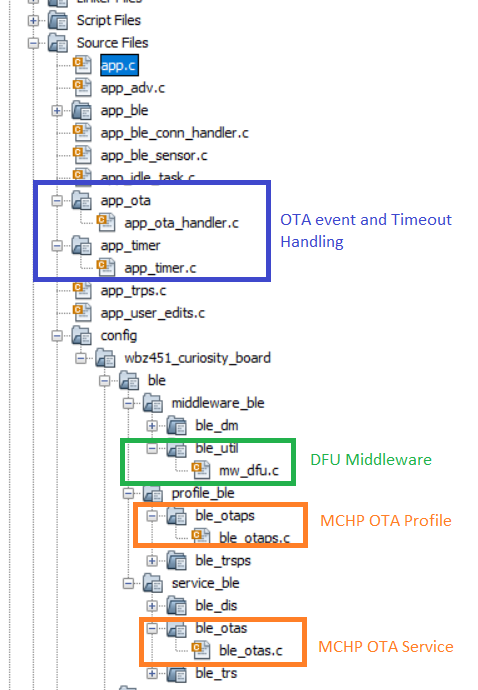
After generating the code from MCC tool by clicking Generate button.The project folder structure
is as follows:
The online versions of the documents are provided as a courtesy. Verify all content and data in the device’s PDF documentation found on the device product page.